In this article, we are going to share with you on How to Take a Screenshot on Mac.
Doing screenshots on a computer with the Windows operating system may already be known because it is widely used by the people of India.
However, do you know how to screenshot MacBooks commonly used by Apple users?

The way to take a screenshot on the two computers is clearly different. Even users who just switched to MacBook are often confused because they are not used to it.
So for those of you who want to know how, pay close attention to the explanation below.
Table of Contents
How to Screenshot on Macbook with Keyboard Keys
For beginners, you should learn to take screenshots on a MacBook using the easiest way, namely using the keyboard keys first.
In addition to having many variations, this method is also faster and more practical to use.
This is because this screenshot method can be used for various types of MacBooks so you will remember them faster and start getting used to them. Here are the steps you can take.
1. Full-Screen Screenshot
- Make sure the screen to be screenshot is already open.
- Press Command+Shift+3 on the keyboard at the same time.
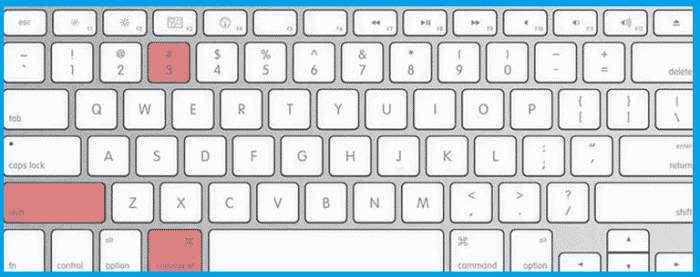 Hold until you hear the sound of the camera snaps.
- Go to the Desktop menu and look for the screenshot file.
- The file has a png format and is automatically saved according to the date you took the screenshot.
- Click the file to see the results.
2. Screenshot of Part of the Screen
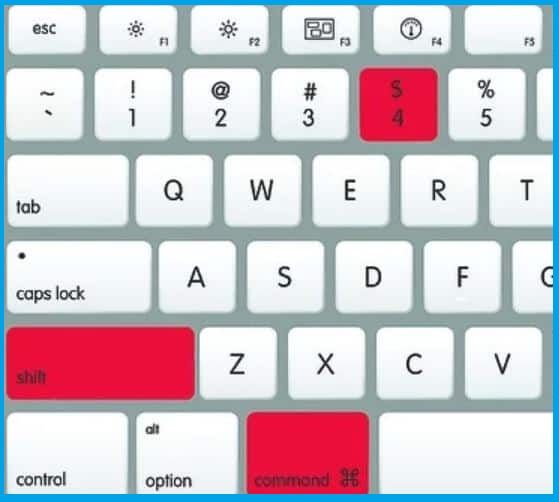
- Press and hold Command+Shift+4 keys at the same time.
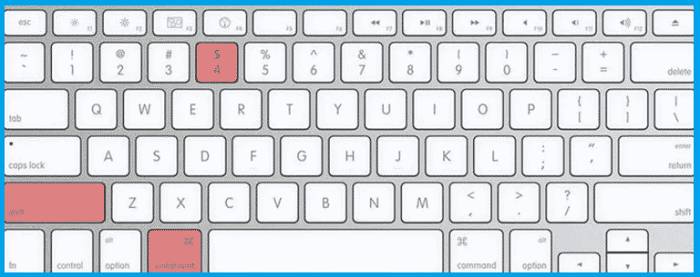 The cursor on the screen will change to a small women’s bag but have coordinates at the bottom left.
- Click and hold the trackpad or mouse and then drag the cursor as you wish to take a screenshot in a certain area.
- Press the ESC key if there is an error so you will return to the state it was in before you started taking screenshots.
- Take your hand off the trackpad or mouse to take a screenshot.
- The screenshot image will be automatically saved in the Desktop menu .
- Look for a file that has a name that matches the date and time you took the screenshot.
- Click the file to open it.
Read Also:
3. Take a Screenshot of the Active Program Window
- Press and hold the Command+Shift+4+Space Bar keys together.
 The cursor on the screen will change to a small camera and the program window on your MacBook will immediately turn blue when highlighted with a mouse or trackpad.
- Select the window you want to screenshot by sucking it in.
- If it turns out that the window you are highlighting is wrong then you can press the ESC key to return to its original state.
- Click the program window that was highlighted until you hear a camera snap.
- Automatically the screenshot file is saved in the Desktop menu .
4. Take Screenshot on Macbook Using Timer
- Open the Application menu then Utilities then select the Grab option .
- Select the Capture option then Timed Screen in the Menu Bar .
- If you want it easier you can press the Command + Shift + Z keys at the same time.
- Press the Start Timer menu to count down the screenshot time.
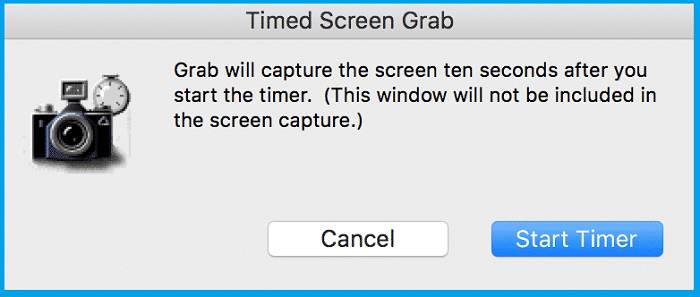 The resulting image will not be saved automatically on the Desktop but will appear as a photo window, so you have to save it manually.
5. Using the Touch Bar
- Press and hold the Command+Shift+6 keys together.
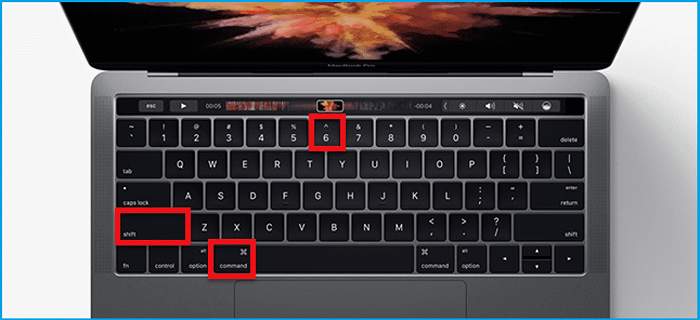 Wait for a few moments until the screenshot process is complete.
- If you have, the screenshot result file will automatically be saved on the Desktop .
6. Take a screenshot in a certain window and then copy it in a certain location
- Press and hold down Command+Shift+4 while you click Window.
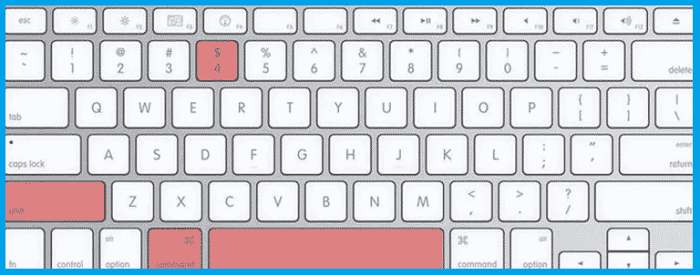 Wait until the screenshot process is complete.
- You can directly copy the screenshot in the desired location.
The methods above are the methods commonly used to take screenshots on MacBooks in general.
Therefore, there may be a slight difference if you use a different type of MacBook product such as the MacBook Air or MacBook Pro.
How to Take a Screenshot on Mac Using Apps
In addition to the six methods above, you can also use both built-in and third-party applications to take screenshots on your MacBook.
Please note that Apple itself has released a default application to make it easier to take screenshots on MacBook products.
Compared to using keyboard keys, this MacBook screenshot method is definitely more practical and faster.
However, unfortunately this application can only be enjoyed by the latest MacBook products. If you want to try it then here are the steps to use it.
1. Using the Default App
- Press and hold the Command+Shift+5 keys at the same time.
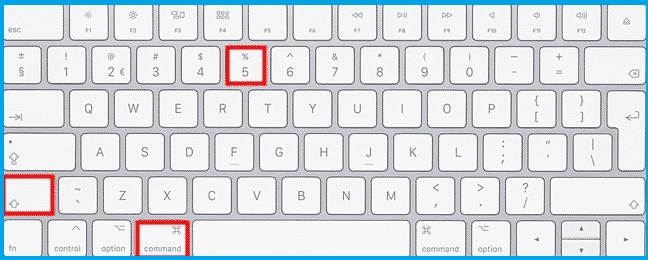 Wait for a small panel with several screenshot options to appear at the bottom of the screen.
- To take a picture, you have to press the Capture menu located in the right corner of the application.
- After that, the screenshots will automatically be saved on the MacBook.
2. Using Third-Party Applications
This method is actually quite easy. It’s just that there are not so many applications, both free and paid, that can be used to help take screenshots on MacBooks.
Not only that, information about how to use the application is very rarely found.
Although there is no information on how to use it, you can still find out what applications can be used to take screenshots on MacBook. Although not many here are examples.
1. Skitch

It’s so small that it won’t take up much of your MacBook’s memory. This application can be used on OSX10.11 which has a 64-bit processor.
Besides being able to take screenshots, this application can also be used to export images by drag and drop files.
2. Lightshot Screenshot
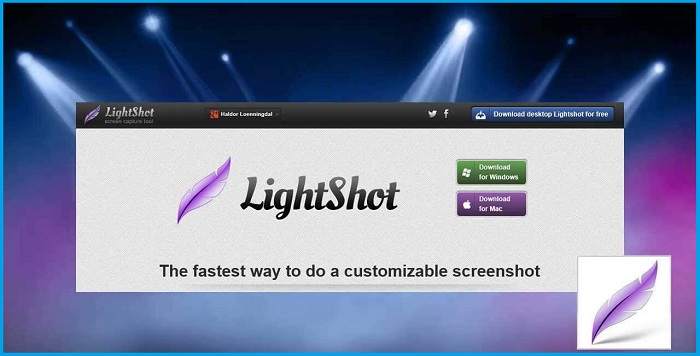
The size of this application is only about 0.7 megabytes, so it is very light. Even so, taking screenshots with this application is much easier than the usual way.
Not only capturing images, you can also share them to various social media with this one application.
3. Xnip
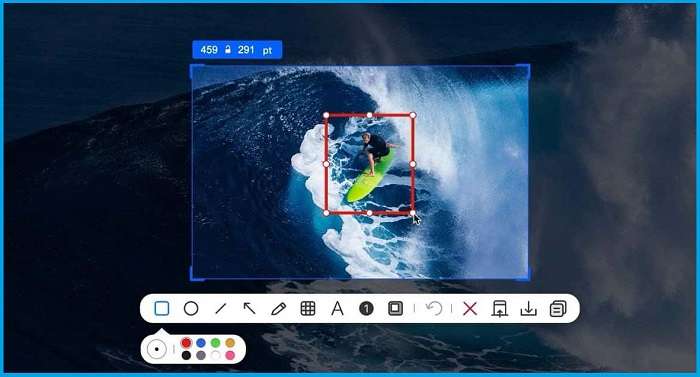
This application is quite sophisticated because it can take screenshots of more than one image and then combine them into one such as images, news and so on.
This application can be used for MacBook OSX10.12 with 64 bit processor. Unfortunately, this application cannot be used for free.
You have to pay around IDR 64,000 per year to use it. In addition to screenshots, you can also open several features such as watermarks and so on.
4. Monosnap
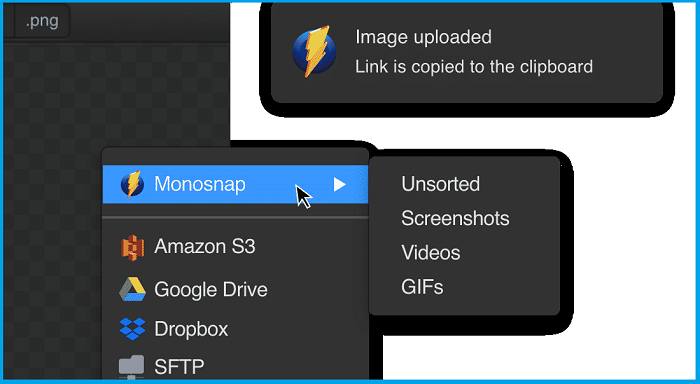
This application is considered to have the most complete features. There are features such as screencast, recording, blur effect, delayed screenshot and so on. Unfortunately, the size of this application is very large and can only be used for OSX10.13 which has a 64-bit processor.
5. Snip
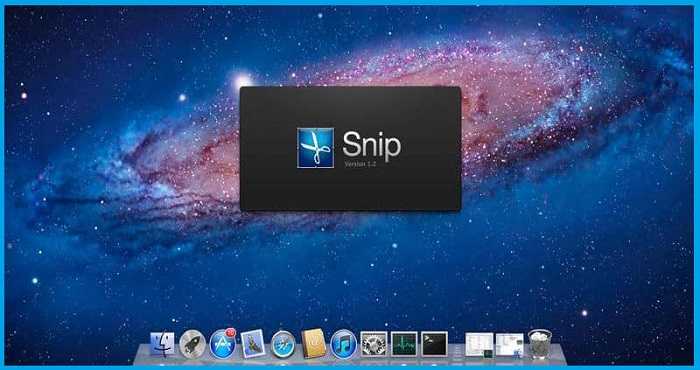
This application can be used for OSX10.6.8 which has a 64 bit processor. It’s also very small and light so it doesn’t overwhelm your computer.
In terms of appearance, this application is known to be quite simple and easy to use.
Although not all of them are free, the above applications are guaranteed to be clean from various viruses and malware that have the potential to damage your MacBook device.
In fact, the paid version of the application is considered to have much better protection.
How to Save Screenshot Results on Macbook
All screenshots will automatically be directly saved in the Desktop menu. Unfortunately, this method is considered not too messy so it often confuses.
Not only that, saving the screenshot file on the Desktop can also make your MacBook’s performance decrease.
Even though it’s the default but this doesn’t mean you can’t save it to another place such as the Clipboard or others to make it easier for you to find the desired screenshot file.
If you want to directly copy or change it then you can use the methods below.
1. Screenshot of the Whole Screen
- Press and hold the Control+Command+Shift+3 keys at the same time.
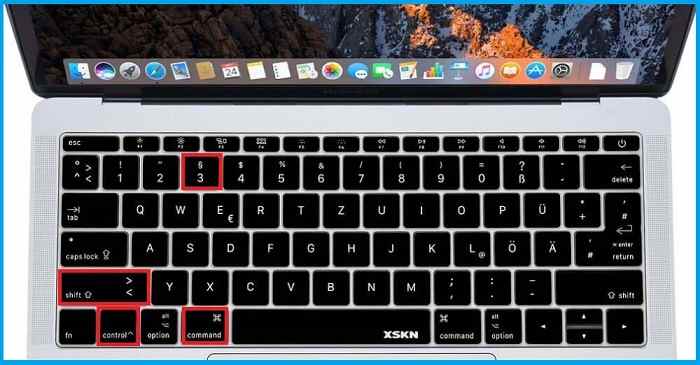 Move the screenshot file to the Clipboard menu .
- Press Command+V simultaneously to copy the screenshot image.
2. Screenshot of Part of the Screen
- Select the area you want to take a screenshot of.
- Press and hold the Control+Shift+5 keys at the same time.
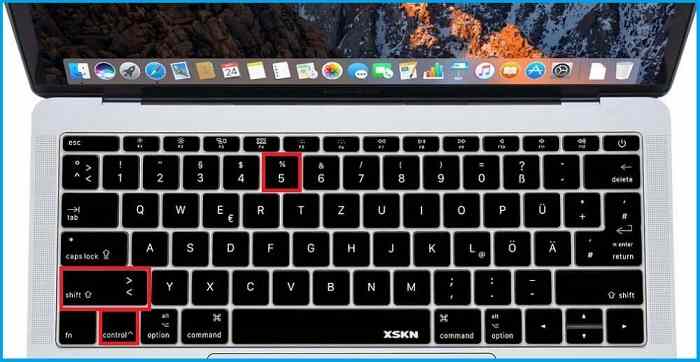 Save the screenshot to the Clipboard menu .
- Copy the screenshot by pressing Command + V simultaneously.
3. Using the Screenie App
- Install Screenie then enter the application.
- Click Preferences to change the location of the screenshot result folder.
- Select the Screenshot option then select a new location to save the screenshot.
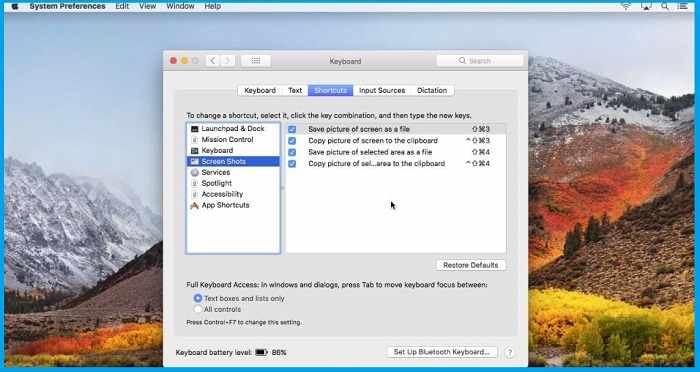 If it is successfully changed then you will not find the screenshot file in the Desktop menu
- Check whether the file has been successfully transferred by doing a screenshot normally.
4. Use the Finder Menu
- Enter the Finder menu .
- Create a directory to store all your screenshots later.
- Hover over a directory called Document .
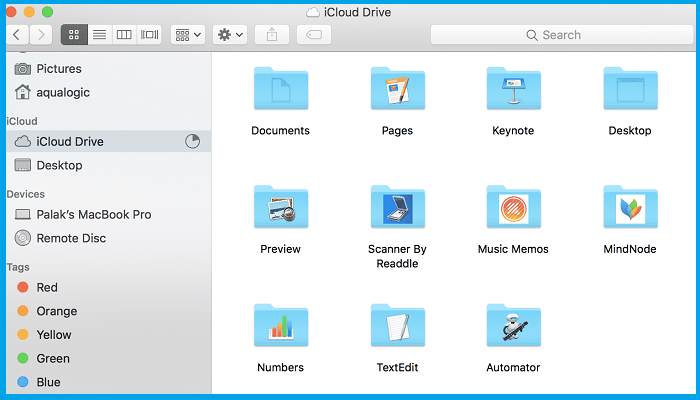 On the Document menu, select the New Folder option by right-clicking.
- Name the file with something easy to remember. For example
- Open Terminal and run the command defaults write com.apple.screencapture location ~/Document/SS (the name of the file to be filled in the screenshot).
- Write killall SystemUIServer and press
- Check if the screenshot storage location has moved by taking a screenshot then checking the SS file.
It should be reminded that the Terminal menu is usually quite rarely used because it requires sufficient knowledge of computers.
Even so, the storage method above is still quite simple so it is still quite easy to understand.
How to Copy Screenshot on Macbook?
After taking a screenshot, the results will be saved automatically in the Desktop menu. You just need to open the file to view it.
However, if you want to use the screenshots then you should see examples of various ways below.
1. Copy screenshots on MacBook
- Open the software where you want to place the screenshot immediately after taking the screenshot.
- Directly copy the screenshot by pressing the Command + V keys simultaneously.
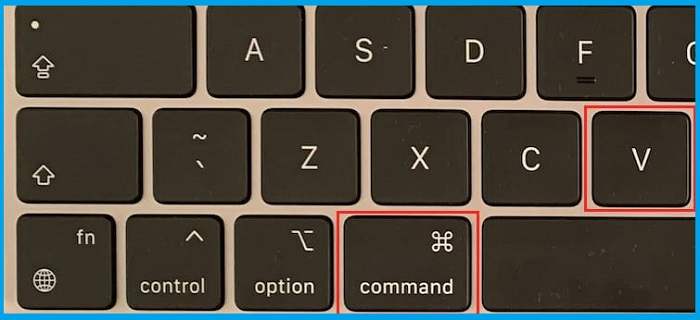 The results of the screenshot will immediately appear in the application and are ready to use.
- The screenshot file will then automatically be saved on the Desktop .
Unfortunately, some of the ways to screenshot MacBook above may not all work on older MacBook products.
Because it is not compatible with the old OS, you need to use another method to make it easier to take screenshots on the device.


![How To Fix: Avast VPN Not Working Error On Windows [2025] Best Methods To Fix Avast VPN Not Working On Windows](https://techmaina.com/wp-content/uploads/2021/04/Best-Methods-To-Fix-Avast-VPN-Not-Working-On-Windows-218x150.png)


![How To Fix: Avast VPN Not Working Error On Windows [2025] Best Methods To Fix Avast VPN Not Working On Windows](https://techmaina.com/wp-content/uploads/2021/04/Best-Methods-To-Fix-Avast-VPN-Not-Working-On-Windows-100x70.png)

![Latest Free IPVanish Premium Accounts List [2025] Latest Free IPVanish Premium Accounts List](https://techmaina.com/wp-content/uploads/2021/09/Latest-Free-IPVanish-Premium-Accounts-List-100x70.png)