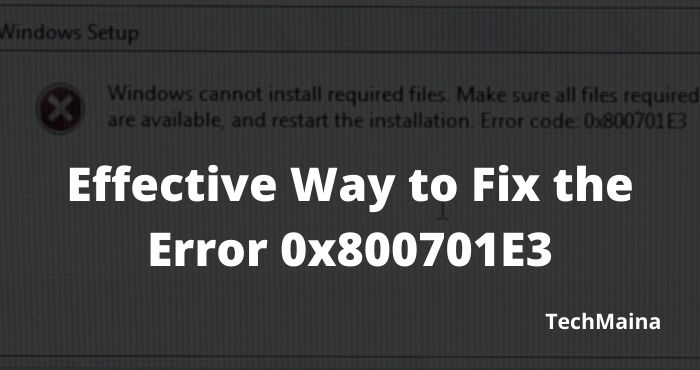
Several users encounter the error 0x800701E3 when performing an operation on a hard drive / SD card that involves copying or moving files on a Windows computer.
In most cases, the problem occurs when the user tries to move files from one hard drive to another.
Other users report that the issue occurs when they try to erase the installation of Windows 10 or a different version of Windows.

Table of Contents
Reasons for an Error 0x800701E3
The error message “The request failed due to a fatal device hardware error” appears when the user tries to copy or send files from the computer to an external hard drive.
Here are the main reasons why this happens:
- Cable problems, It may be damaged or poorly connected. Therefore, the data cannot be transferred.
- Hardware problems on an external hard drive.
- Other problems with an external hard drive. Most often these bad sectors cause the error “The request failed due to a fatal device hardware error”
How to fix Windows Upgrade Error 0x800701E3?
To fix Windows upgrade error 0x800701E3, you can try performing the resolution steps below.
Please check if the problem is corrected after each troubleshooting step. If the problem persists, you can go to the next step.
Method 1. Check or Change the USB Connection with the External Drive

Quite often the problem is a damaged port or cable. Therefore, try another port to transfer data between your computer and an external hard drive, or if that doesn’t help, look for another USB cable.
This method is especially good if your external hard drive is in the detected / undetected position when you connect it to the computer.
Method 2. Update the External USB Drive Drivers
To fix “Query Failed Due to Fatal Device Hardware Error” you can update the driver. Outdated drivers cause interruptions in the operation of the external hard drive. For that, proceed as follows:
- Simultaneously press Win + X keys, then select Device Manager.
- Now select the desired external drive and click on it with the right mouse button.
- From the list, select Update Driver. Wait until the process is complete and check if the problem is gone.
Method 3: Reset Windows Update Components.
Resetting the Windows Update components allows you to delete the files from the SoftwareDistribution and Catroot2 folders.
To fix the upgrade error 0x800701E3, it is necessary to remove all old files from Windows Update.
To perform the operation, follow the troubleshooting steps below.
- Click on the start button, type CMD in the search box, when the command prompt appears, right-click, and select the option Run as administrator.
- In the command line, type the following commands and press Enter after each command:
- After disabling the required services, you need to delete some files from drive C in a folder.
- Navigate to the location C: \ Windows \ SoftwareDistribution and delete all the files present in this folder.
- To do this, in the command line, type the following command and press Enter: Del “% ALLUSERSPROFILE% \ ApplicationData \ Microsoft \ Network \ Downloader \ qmgr * .dat”
- After that type the command below and hit enter.
- Then run this “ batch script ”, which can help you solve different types of Windows Update problems. This script can be used in all versions of Windows for Download:
- Restart Winshock with this command and press ENTER: netsh Winsock reset
- After that, you need to restart all the stopped services. To do this, type each of the commands below and press Enter.
- Now close the command prompt, restart your computer, and try to run Windows setup. This should resolve the error 0x800701E3 on your computer. If the error persists, follow the other troubleshooting steps.
Method 4: Run the DISM tool to Fix the Error 0x800701E3.
The Deployment Image Servicing and Management tool is a tool that is built into Windows and can be used to service a Windows image.
It often fixes many issues with various aspects of Windows and therefore can help you in that area as well.
Note that this is a very powerful tool and making a mistake when you run it can cause problems – so be careful.
Follow the steps below to run the DISM tool on your computer.
- Tap on the Windows logo, in the search bar type CMD. The Command Prompt option appears.
- Right-click on it and select the Run as administrator option.
- When you are on your Command Prompt, type the following commands, then press Enter on your keyboard after each command, in order to run it. Make sure to wait until the first command will be finished working before starting with the second.
- wait for the second command to complete and close the command prompt by clicking the X, or typing exit and pressing Enter.
- Once it’s done, restart your computer and try to run Windows Setup again. Hopefully, the installation works fine without the error 0x800701E3. If the problem persists, you can proceed to the next steps.
Method 5: Run the SFC (System File Checker) Scan
Running the SFC scan for corrupted files on the computer and repairs them. To fix error 0x800701E3 during the Windows setup, you can try running an SFC scan.
To run an SFC scan, follow the steps below:
- Press the Windows key to open the Start menu.
- Type Command Prompt or CMD in the search field.
- Right-click on Command Prompt. Select Run as administrator.
- Enter the password if requested.
- Type sfc / scannow on the command prompt and press Enter.
- The analysis will take some time. Then restart your computer.
- try to run windows setup again and see if the error 0x800701E3 has been resolved.
Method 6: Repair Hard Drive if Sectors are Bad
Bad sectors or errors in the hard drive also prevent you from upgrading Windows and causing error 0x800701E3.
To check hard drive bad sectors, you can try performing the resolution steps below.
- In the search box, type CMD.
- Right-click on Command Prompt and select Run as administrator.
- In the command prompt, type chkdsk C: / f / r / x and press Enter .
The / f option will attempt to correct any errors found.
The / r option will locate bad sectors and recover all readable information.
The / x option will force the volume you are about to check to be unmounted before the utility starts scanning.
- If the C: drive is used, type Y to start a search the next time you restart your PC. If so, exit Command Prompt. and restart the computer.
- The analysis of the hard drive part will take some time. It will check for errors and correct them automatically.
Hopefully, Windows Upgrade will work fine this time around without the 0x800701E3 error.
Method 7: Disable the “Secure Boot” feature
Some affected users have reported that error 0x800701E3 no longer occurs during a clean install of Windows after disabling “Secure Boot ” from “ UEFI / BOOT ”.
“Secure Boot” is an industry-standard that was developed by the leading manufacturers in the PC industry to ensure that PCs use only Original Equipment Manufacturers (OEM) software.
However, this security feature is known to create problems with installation media created outside of official channels ( using Rufus and other similar software ).
Here is a quick guide on disabling ”Secure Boot”:
- Press the Setup key several times after switching on your machine (during the initial boot sequence).
- Press the BIOS key during the boot process.
- Once you enter the BIOS menu, look for a setting named “ Secure boot ” and set it to Disabled. The exact name and location will be different from manufacturer to manufacturer, but you’ll usually find it in the Security tab – you might also find it in the Boot or Authentication tab.
- Save the changes and exit your BIOS settings. Next, check if you are still getting the error 0x800701E3.
Conclusion:
The above resolution steps help you to fix Windows upgrade error 0x800701E3. Hope the installation works without an error message. If you find this article useful, respond in the comments

![How To Fix: ALT GR Not Working On Windows 10 [2025] How To Fix ALT GR Not Working On Windows 10](https://techmaina.com/wp-content/uploads/2021/04/How-To-Fix-ALT-GR-Not-Working-On-Windows-10-218x150.png)
![Hard Drive Repair – How to Repair a Damaged Hard Drive [2025] Hard Drive Repair - How to Repair a Damaged Hard Drive](https://techmaina.com/wp-content/uploads/2020/12/Hard-Drive-Repair-How-to-Repair-a-Damaged-Hard-Drive.jpg)
![How to Check What Graphics Card You Have [2025] How to Check What Graphics Card You Have](https://techmaina.com/wp-content/uploads/2021/09/How-to-Check-What-Graphics-Card-You-Have-218x150.png)


![How To Fix: Avast VPN Not Working Error On Windows [2025] Best Methods To Fix Avast VPN Not Working On Windows](https://techmaina.com/wp-content/uploads/2021/04/Best-Methods-To-Fix-Avast-VPN-Not-Working-On-Windows-100x70.png)

![Latest Free IPVanish Premium Accounts List [2025] Latest Free IPVanish Premium Accounts List](https://techmaina.com/wp-content/uploads/2021/09/Latest-Free-IPVanish-Premium-Accounts-List-100x70.png)