Packet Loss In Dota 2 problems are common in online games. PB, PUBG, Valorant to include Dota 2.
When packet loss occurs, what usually happens is the character freezes. Or like to move suddenly (the cool term is teleport ).
Of course, this would be very annoying. For that, we have to deal with it.

Table of Contents
What is Packet Loss?
Packet loss is the term used when our internet network connection cannot connect to the game server. In this case Dota 2.
Causes:
- ISP ( Internet Service Provider ) is experiencing restrictions or interruptions
- Ping or internet network is not stable
- Game server crash
- Game data corruption
How to Fix: Packet Loss When Playing Dota 2
To overcome the packet loss problem, there are several solutions that you can do.
Please try one at a time.
#1. Server Check
First, test the Dota 2 server. Is it problematic or not. Here we can use special additional software. Namely WinMTR.
Here’s how:
- First, please download and install the WinMTR application.
- If so, open the application.
- Fill in the Pop IP of the Dota 2 server in the host field. For example syd.valve.net and click the Start button.
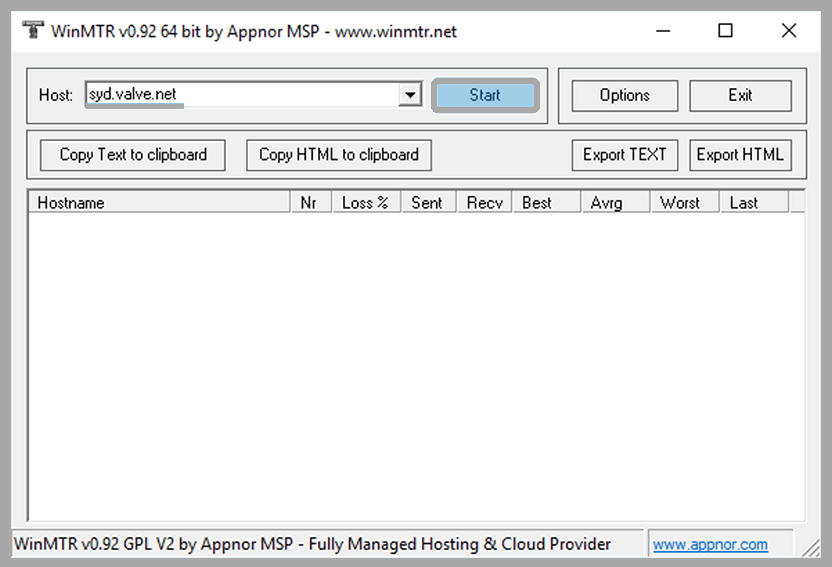 Then open the Dota 2 game and play.
- Press Alt + Tab key to return to the WinMTR application.
- Continue to check packet loss in the application in the loss % column.
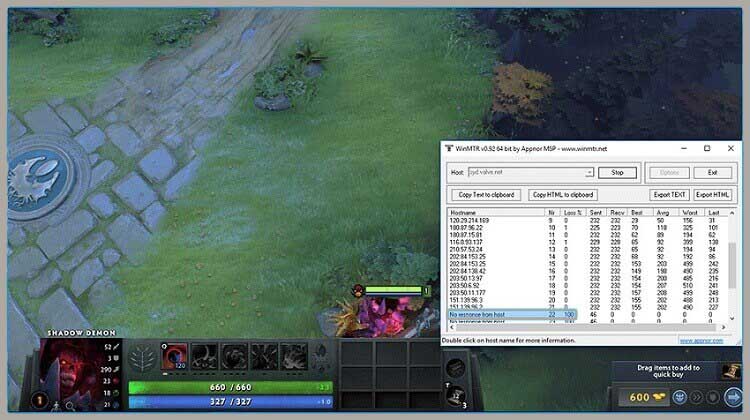 Done.
Done.
A value of 100 indicates the server is not responding or the connection is disconnected.
#2. Dota 2 File Reverification
On Steam, there is a verify game files feature.
This feature is to check whether your game data is the same as the game data on the Steam server, or not.
This is important. Because if any data is corrupted, this will affect the connection, including the Dota 2 game.
- First, please open Steam.
- Then select the Library tab.
- In the Dota 2 game, right-click and select the Properties menu.
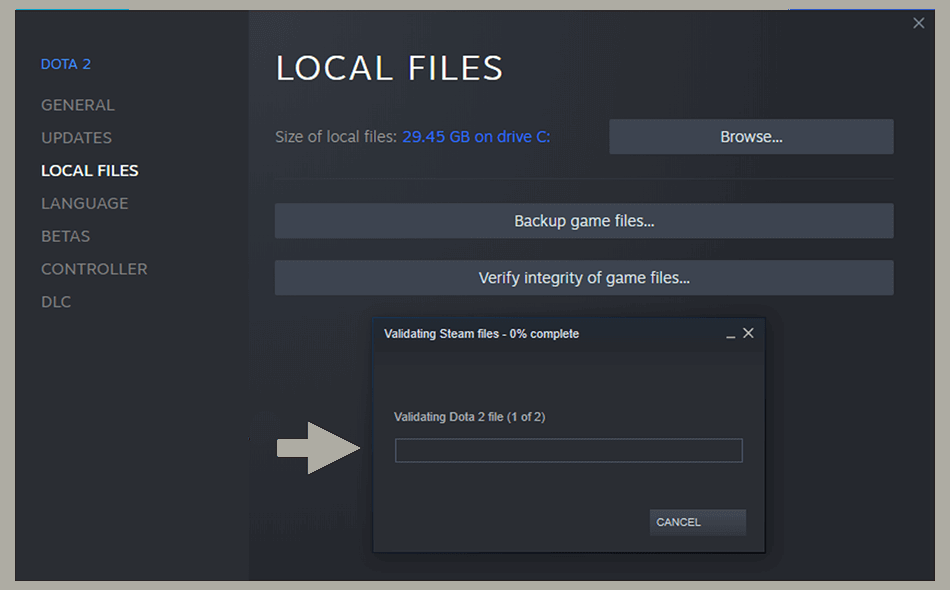
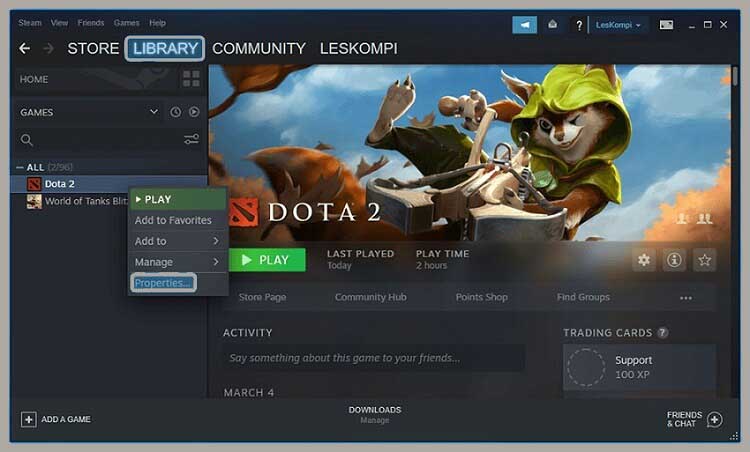 If so, select the Local Files tab.
- Then click the Verify Integrity of Game Files menu.
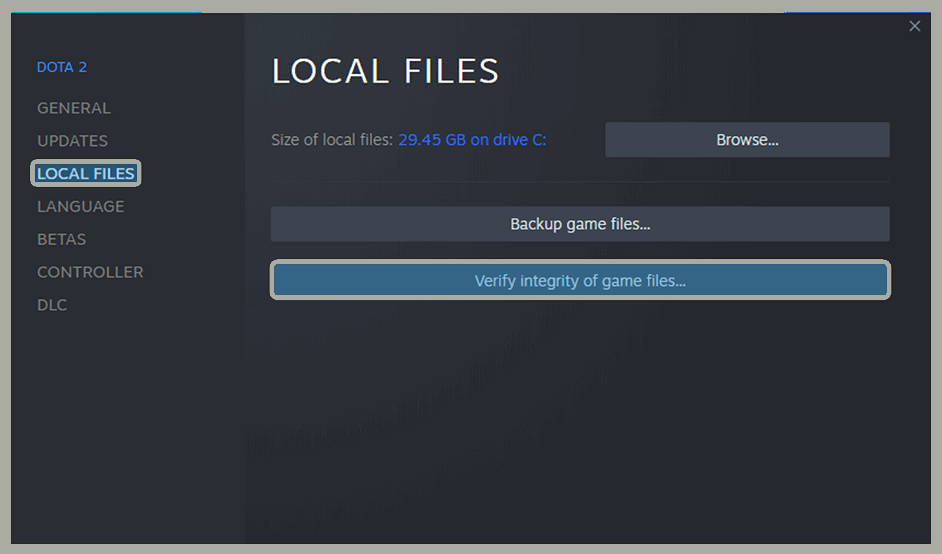 Wait a few moments until the Dota 2 game data validation process is complete.
#3. Set Command-List
This Command List is used specifically to refresh the Dota 2 server that you choose. To do so, please follow these steps:
- Open Steam.
- Then click the Library tab.
- Right-click on Dota 2 and select the Properties menu.
- Fill -console in the Launch Options field.
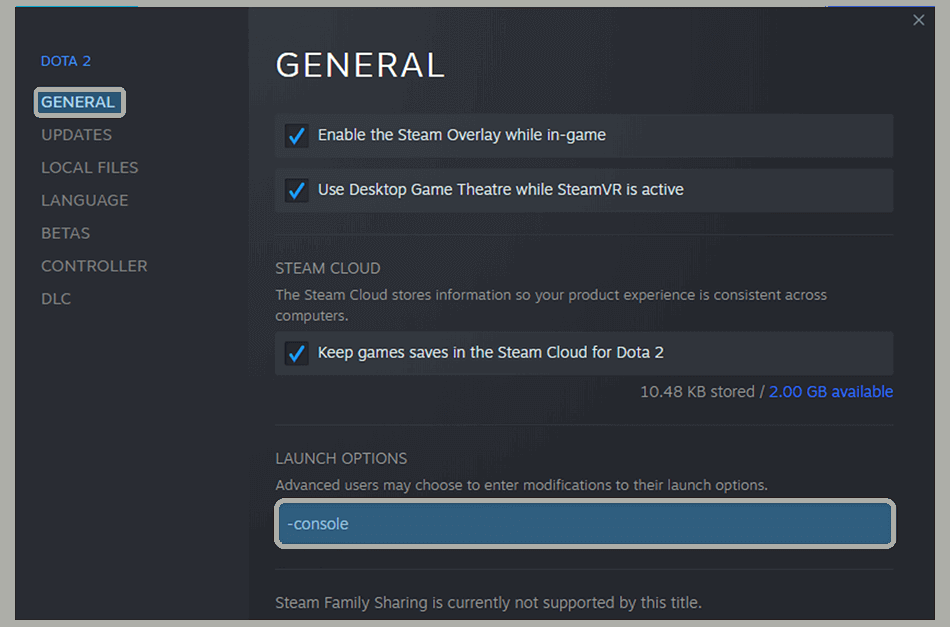 Then please close the dialog box.
- If so, open the Dota 2 game by clicking the Play button.
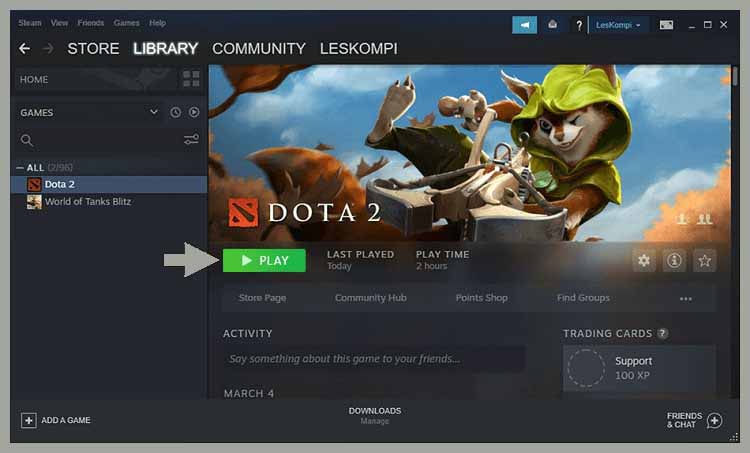 After Dota 2 opens, click the settings menu.
- Then click the To Advanced Hotkeys menu.
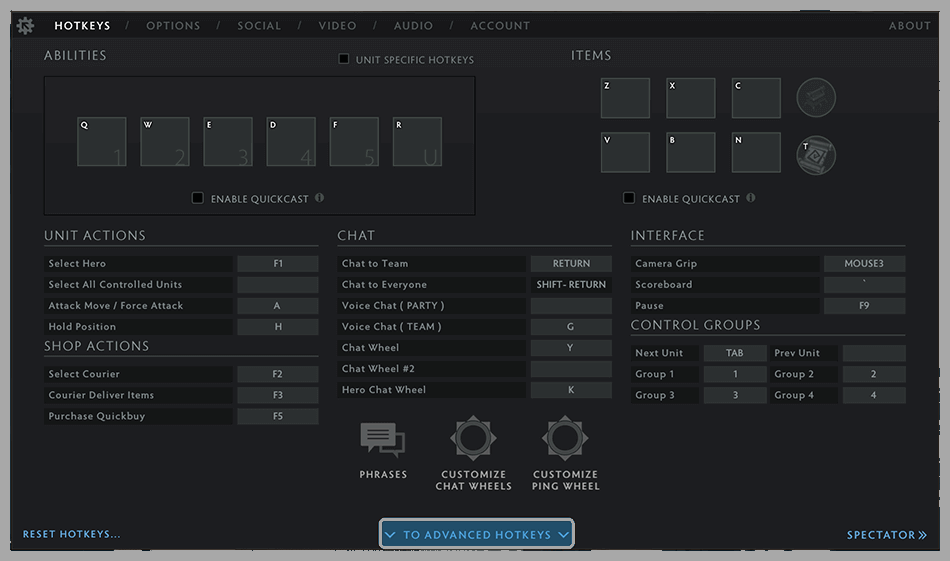 Type a slash (\) in the console field.
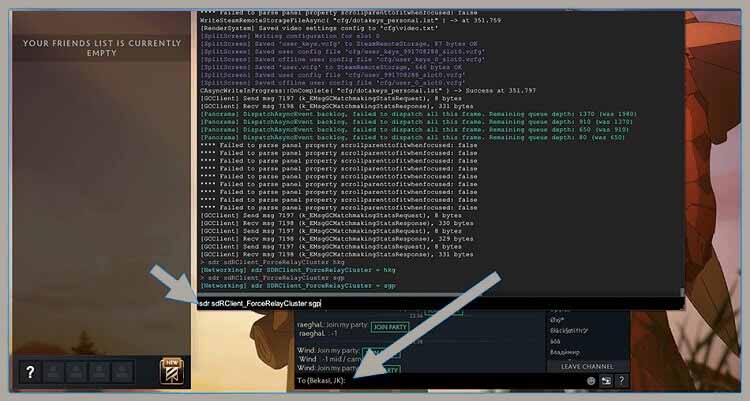
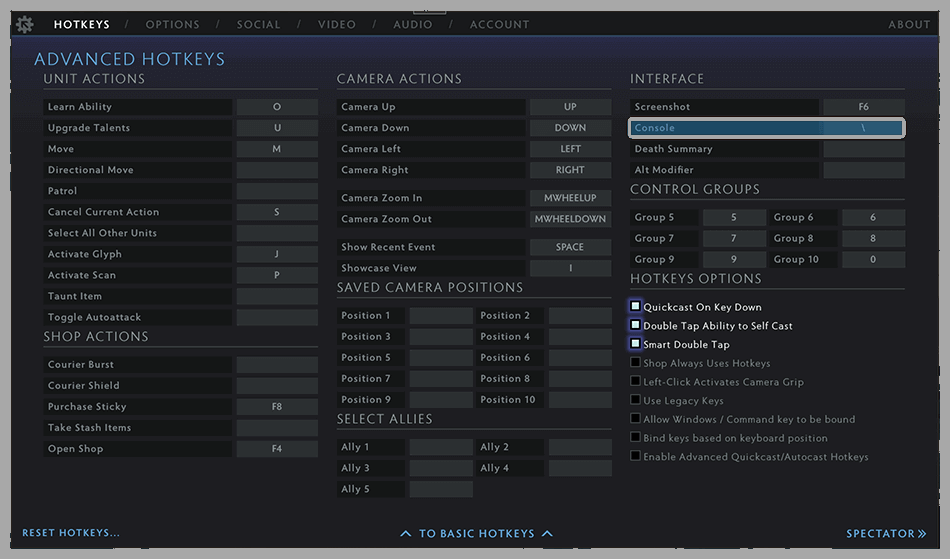 If so, please open the chat and type a slash.
- Fill in the command sdr sdRClient_ForceRelayCluster us. Press Enter.
 Done.
Done.
The command above means, I set the region to the US. If you want to use another area, just change it.
Read Also:
- Fixed: Unable To Initialize Steam API Error In Windows
- Steam Tuesday Maintenance: Everything You Should Know
#4. Enable Low-End Network
By activating the Low-End Network feature in Dota 2, the internet speed required for Dota 2 will be reduced. So that the connection between servers can run more smoothly.
Here are the steps:
- First, open the Dota 2 game.
- Then please click the settings menu at the top left.
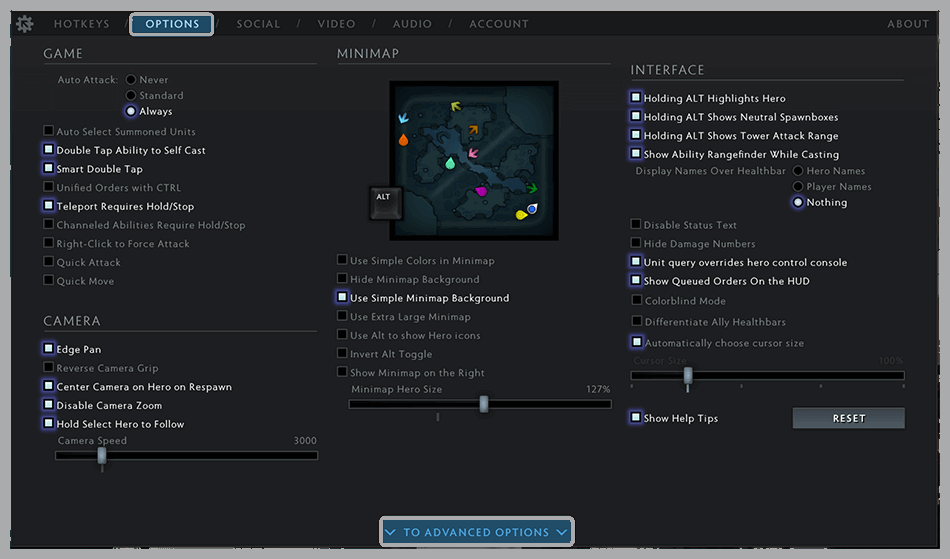
- Once the settings dialog box opens, click the Options tab.
- Then select the To Advanced Options menu.
 Check the Network section .
- Select the I Have a Low-End Network option.
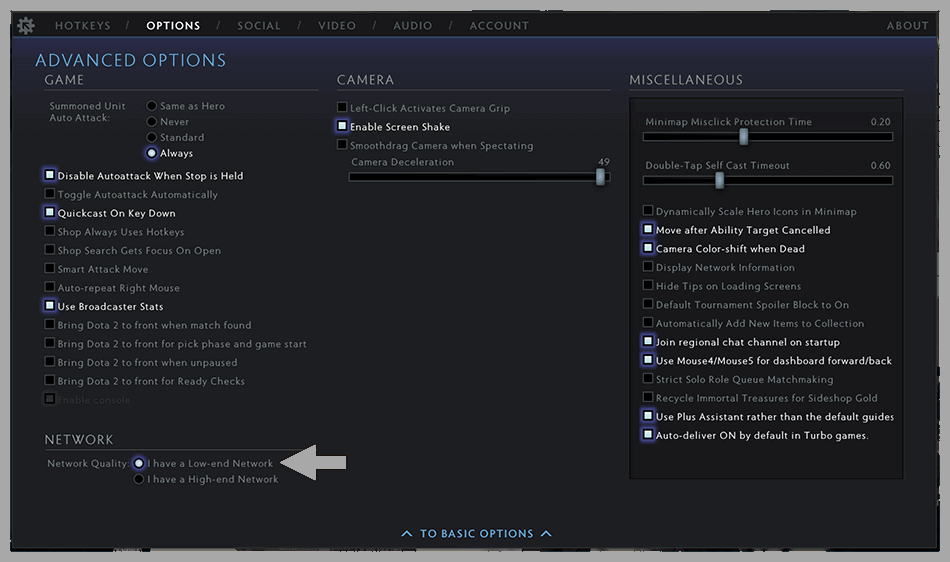 Done.
Done.
#5. Choose Another Dota 2 Server
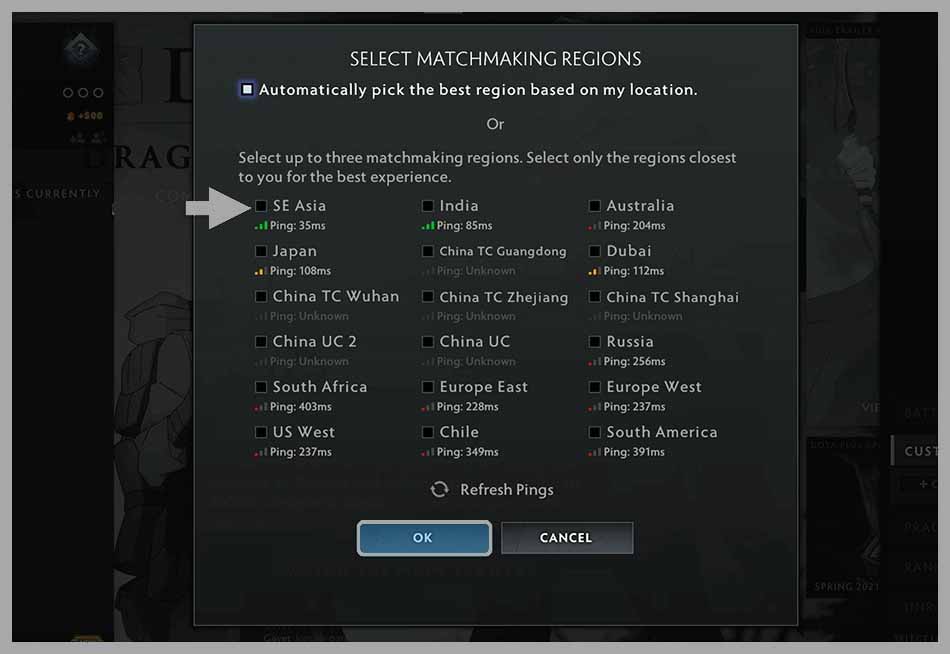
Generally, Dota 2 servers are selected by region. For example, I am in Indonesia, will be directed to the SE Asia server.
Even though the closer the server is, the better the ping will be, but this does not apply if the server region that we are connecting to has a problem.
The alternative solution, try choosing a different server.
- Open Dota 2.
- Then click Play in the menu.
 Click the Regions menu.
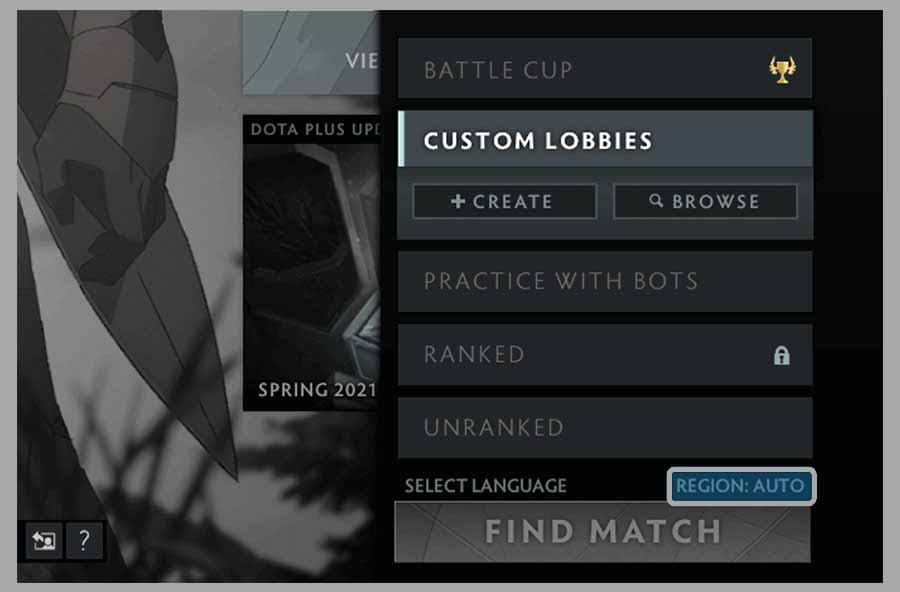 Select the server or region as desired, then click OK.
 Done.
Done.
As much as possible choose a server that is green or yellow.
#6. Using VPN
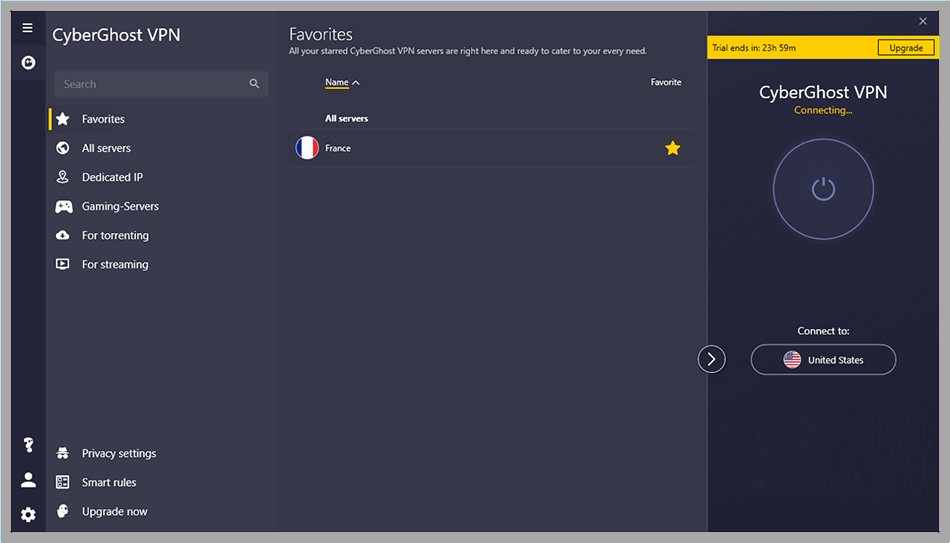
Using a VPN to solve packet loss problems in Dota 2.
Now there are many, you know, applications like this. Its function is to reroute the network so that it connects more smoothly to the game server.
Examples that can be tried are CyberGhost VPN, Exit Lag, and others.
If you confuse that which VPN is best for PC, then don’t worry we already shared details guide on that topic, so you can read the previous post on the best VPN for windows and mac.
#7. Changing Network
If you have tried all the methods, but the packet loss problem in Dota 2 still appears, the last solution is to try changing the internet network.
Because it’s possible that the provider used is experiencing interference, whether it’s a ping or the speed is not good.
If you use another network, make sure it doesn’t have a problem.
Conclusion
So many explanations about how to overcome Packet Loss In Dota 2. It is hoped that your Dota 2 game can be played normally again, hehe.
Well, if you have questions regarding Dota 2, you can ask them in the comments.
May be useful.


![How To Fix: Avast VPN Not Working Error On Windows [2025] Best Methods To Fix Avast VPN Not Working On Windows](https://techmaina.com/wp-content/uploads/2021/04/Best-Methods-To-Fix-Avast-VPN-Not-Working-On-Windows-218x150.png)


![How To Fix: Avast VPN Not Working Error On Windows [2025] Best Methods To Fix Avast VPN Not Working On Windows](https://techmaina.com/wp-content/uploads/2021/04/Best-Methods-To-Fix-Avast-VPN-Not-Working-On-Windows-100x70.png)

![Latest Free IPVanish Premium Accounts List [2025] Latest Free IPVanish Premium Accounts List](https://techmaina.com/wp-content/uploads/2021/09/Latest-Free-IPVanish-Premium-Accounts-List-100x70.png)