Howdy friends, are you want to know how to install NVIDIA Drivers? Well, In this post we will share how to install NVIDIA drivers on your pc or laptop.
So, let’s get started…
One of the VGA vendors that we often hear. Yup, NVIDIA. NVIDIA is famous for its GTX and RTX series which are great for gaming purposes.
Whether it’s on a laptop or PC, there are now a lot of NVIDIA users, you know. Including myself, who incidentally used the GTX 1660 Super. Hehe.

Now, to activate the NVIDIA VGA, we must first install the driver, of course. The goal, namely so that the NVIDIA VGA can run normally.
Unfortunately, there are still many who don’t know about how to properly install NVIDIA drivers. Especially for the driver version with the latest updates.
For this reason, here I will explain the steps.
Table of Contents
How to Install NVIDIA Drivers on a PC or Laptop
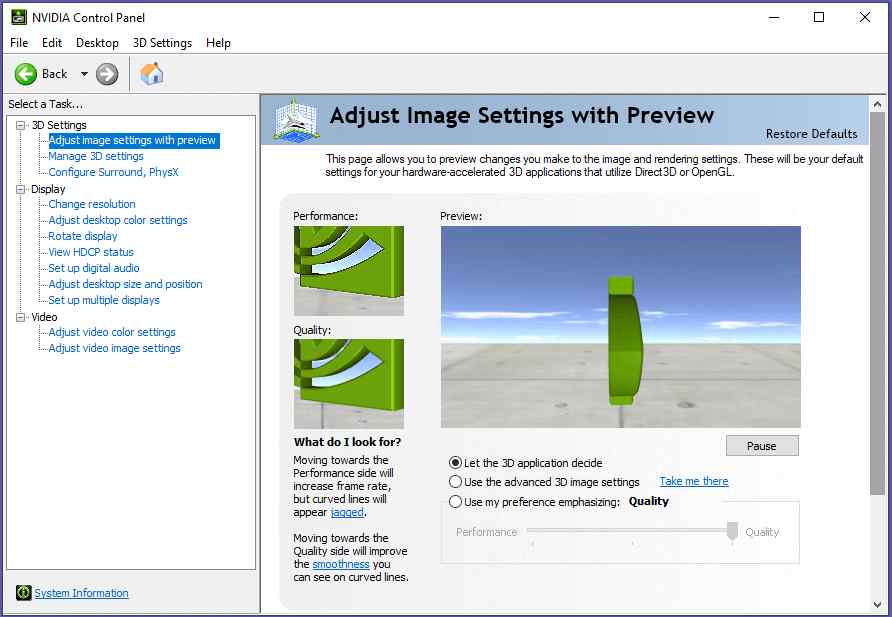
We need to know beforehand that to install the NVIDIA driver, we can get the application from two media, namely:
- DVD driver included in VGA.
- NVIDIA official website.
For DVD, usually, we can only find it in the old NVIDIA VGA type. For example the GTX 900 series and below. As for the above, we have to download it yourself via the official website.
If you have a DVD driver, it doesn’t hurt to install the default driver first. It’s easy, really:
- Insert the DVD driver.
- Then look for Setup.exe.
- Please open the program.
It’s different if you have to look for it via the official website. I will explain the steps here.
How to Find NVIDIA Drivers Through the Official Site
The problem experienced by most people is that they don’t know how to find which NVIDIA drivers are compatible with the VGA type they are using.
Even though it’s very easy, you know. The first thing we have to do is to confirm the VGA type first. For example by using the GPU-Z application
If it is known, then we can try checking the driver via the official website.
Step 1. First, open the official NVIDIA site.
Step 2. Well, there we will find the driver settings column.
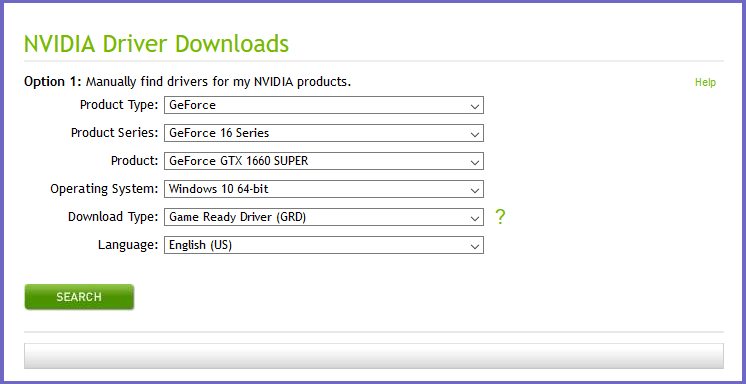
| Product Type | NVIDIA VGA type. |
| Product Series | NVIDIA VGA Series. |
| Product | NVIDIA types and series in full. |
| Operating System | The system type for the driver is installed. |
| Download Type | Driver type for game or studio. |
| Language | Driver language setting. |
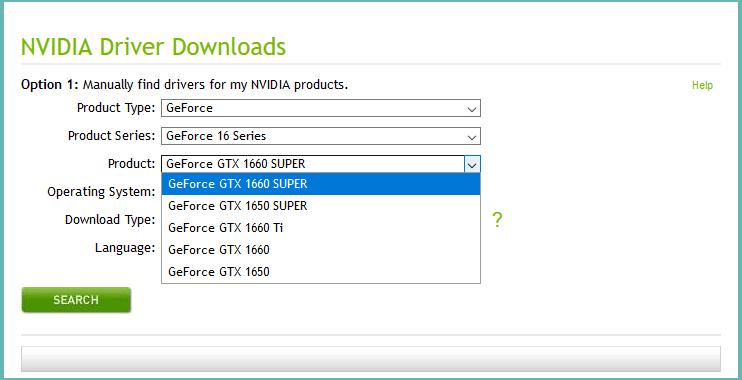
Step 3. If you are using NVIDIA VGA for PC / laptop, please match the settings with the image from my screenshots. Later, just adjust the column Product Series, Product, and Operating System.
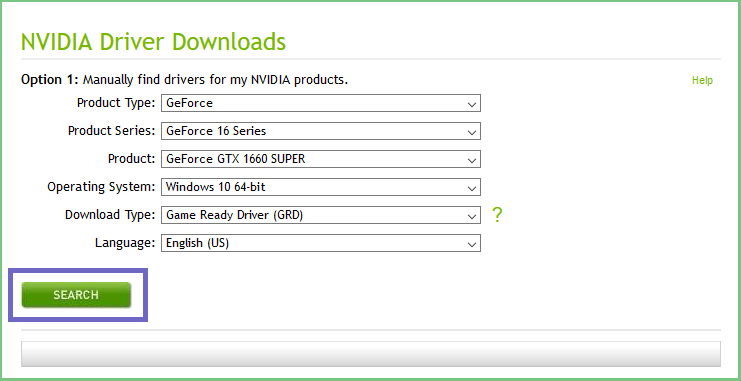
Step 4. Done all, please click the Search button.
Step 5. Now, the latest version of the NVIDIA VGA driver will appear. Click the Download button to save the file.

Just wait until the files are saved.
The advantage is, here we can get the latest version of the driver. Meanwhile, if via DVD, only the driver version is used when the VGA is released.
Read Also:
How to Install NVIDIA VGA Driver on a PC or Laptop
Continue again. Once the file has been in our store, the next step we have to do is install the drivers. For the steps yourself, you can follow the following guidelines:
Step 1. Please open the NVIDIA driver that was previously saved.

Step 2. A new window will appear, click OK.
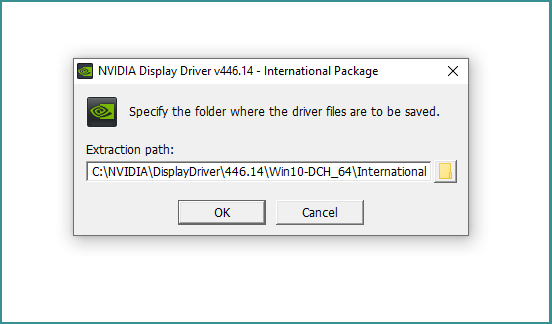
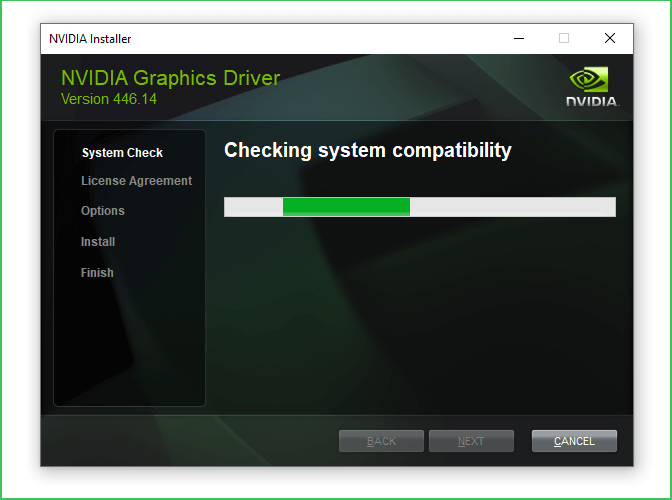
Step 3. After the file extract process is complete, a compatibility checker will appear. Wait for it to finish, huh.
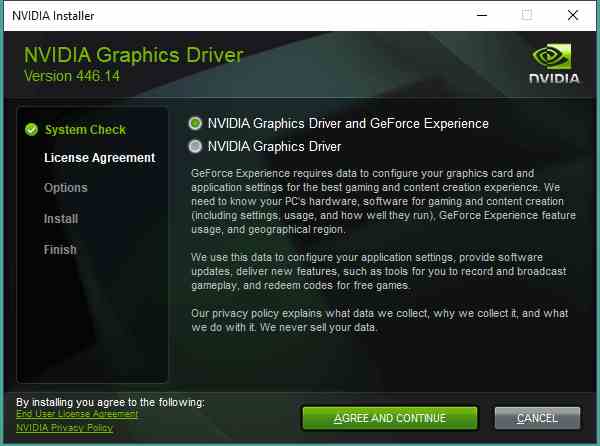
Step 4. Later, two options will appear. Select NVIDIA Graphics Driver and Geforce Experience. Click Continue to continue.
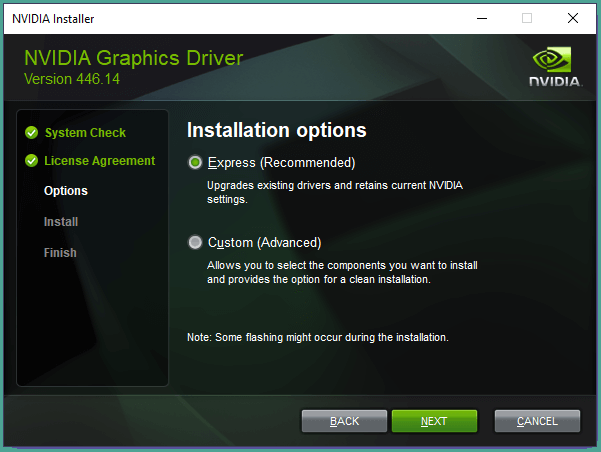
Step 5. Just choose the Express Install method so it’s not complicated. Click Next when done.
Step 6. Wait for the process to complete.
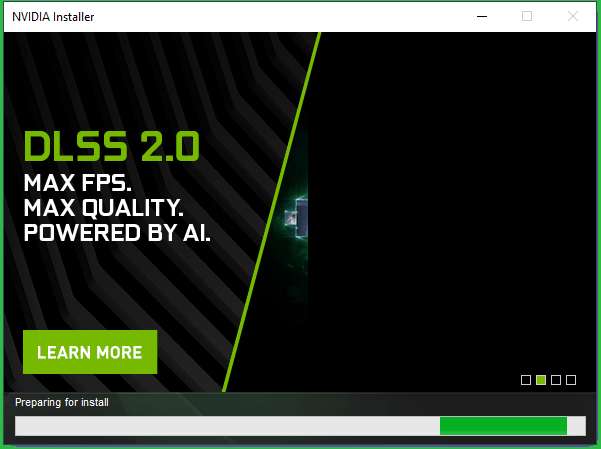
Step 7. Finally, restart the computer.
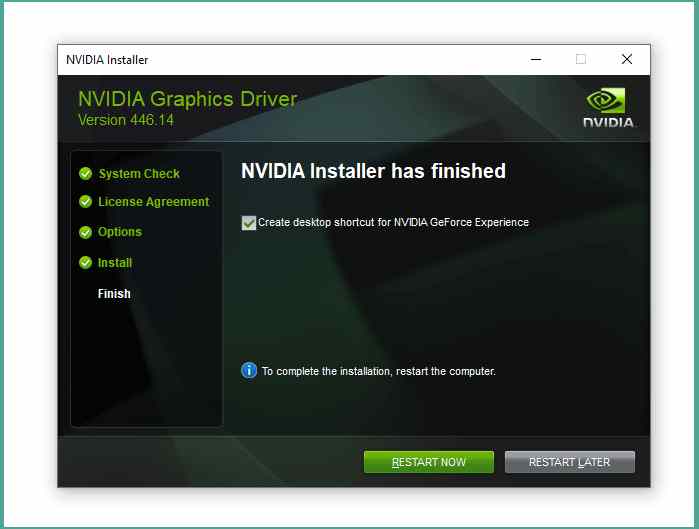
Now, NVIDIA is installed on your PC or laptop. Just use it as usual. 😀
The Final Word
That’s the discussion about how to install NVIDIA Drivers on a PC or laptop. This tutorial can be applied to all versions of NVIDIA VGA, be it the old or new output.
In closing, if anyone doesn’t understand, you can just ask right away, OK.
May be useful.


![How To Fix: Avast VPN Not Working Error On Windows [2025] Best Methods To Fix Avast VPN Not Working On Windows](https://techmaina.com/wp-content/uploads/2021/04/Best-Methods-To-Fix-Avast-VPN-Not-Working-On-Windows-218x150.png)


![How To Fix: Avast VPN Not Working Error On Windows [2025] Best Methods To Fix Avast VPN Not Working On Windows](https://techmaina.com/wp-content/uploads/2021/04/Best-Methods-To-Fix-Avast-VPN-Not-Working-On-Windows-100x70.png)

![Latest Free IPVanish Premium Accounts List [2025] Latest Free IPVanish Premium Accounts List](https://techmaina.com/wp-content/uploads/2021/09/Latest-Free-IPVanish-Premium-Accounts-List-100x70.png)