In this article, we are going to share with you How to Make Automatic Door in Minecraft. So, let’s get started…
There are many creative objects that can be crafted in Minecraft. Starting from cars, golems, and automatic doors that can open on their own when you are near them.
This automatic door is usually often used for the purposes of making houses in Minecraft to forts.
Of course, this automatic door is arguably more practical and cooler to use. Well, if you want to know how to make it, here I will explain here.
Read Also:
Table of Contents
How to Make Automatic Doors in Minecraft
The way this automatic door works is by using sensors. When we are near the sensor, the door will immediately open.
Well, to make the sensor on the door, later you have to use some materials. Such as Redstone, Redstone Torch, and others.
Immediately, here’s how to make it.
1. Prepare the Automatic Door Making Material
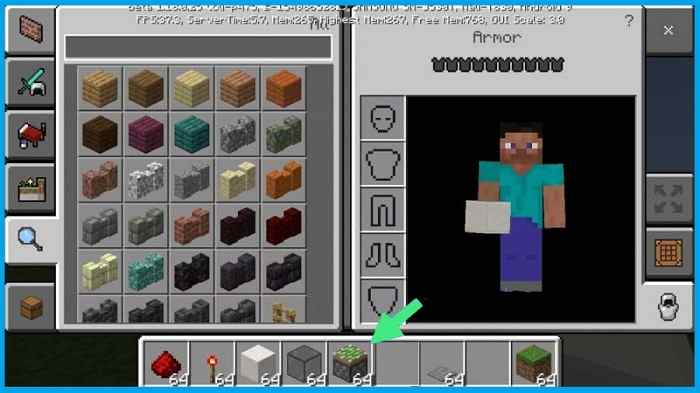
The first step, you must prepare the materials in advance for the manufacture of automatic doors in Minecraft.
| Material Name | Function |
| Redstone | As a power supply |
| Redstone Torch | The power supply that runs through Redstone |
| Block of Quartz | To flow Redstone Torch to Redstone |
| Tinted Glass | As a glass door |
| Sticky Pistons | Open and close the glass door |
| Stone Pressure Plate | As a footrest sensor |
| Grass Block | To patch the excavated area |
2. Make Doors With Pistons
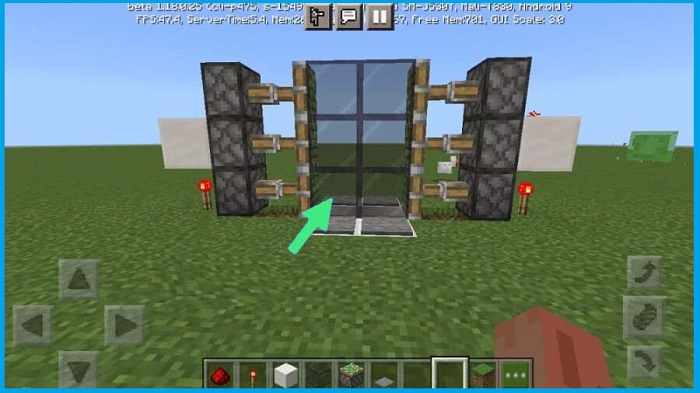
If you have prepared all the materials, then you can put the Sticky Piston and Tinted Glass. It’s like this:
1. Place the Sticky Pistons facing each other with a height of 3 blocks. Then make a distance of 4 blocks between the sides.
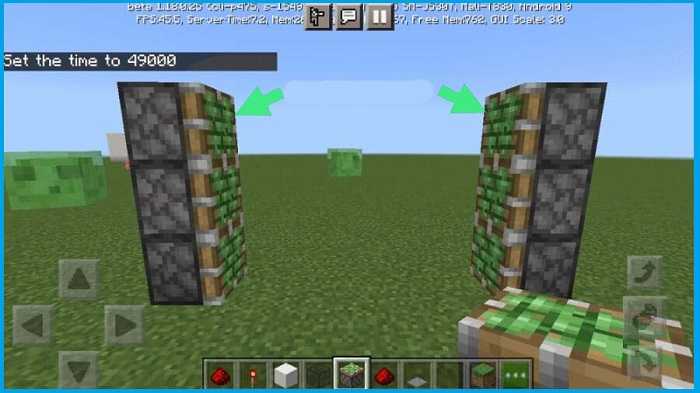
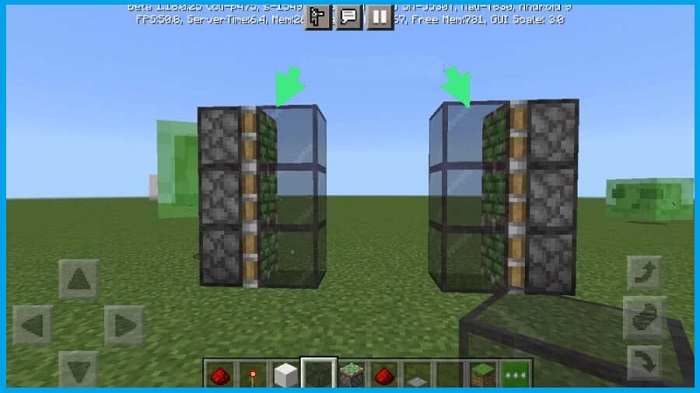
2. Then install the Tinted Glass which will function as a door in front of the Sticky Piston.
3. More or less, the design is like the following picture.
Read Also:
3. Dig a Hole in the Door Area
When you’re done making the door, you can dig a hole that will later be used as a place to run electricity from the Redstone.
1. Make a hole in the door area first. Into two blocks, the width of two blocks long and three blocks.
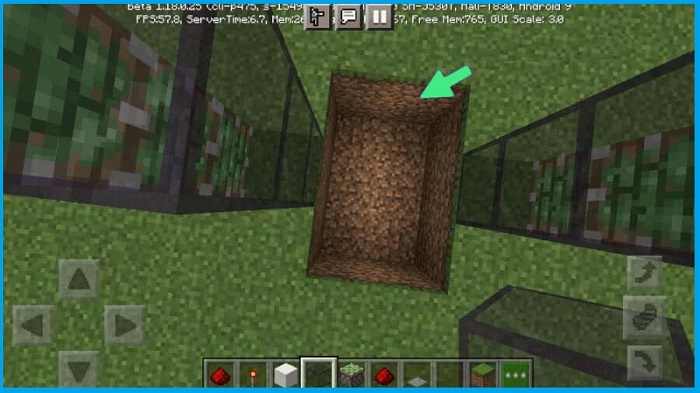
2. Then please go down into the hole.
3. Then make a hole back to the side (direction of the door), 1 block below the middle and 2 blocks above.
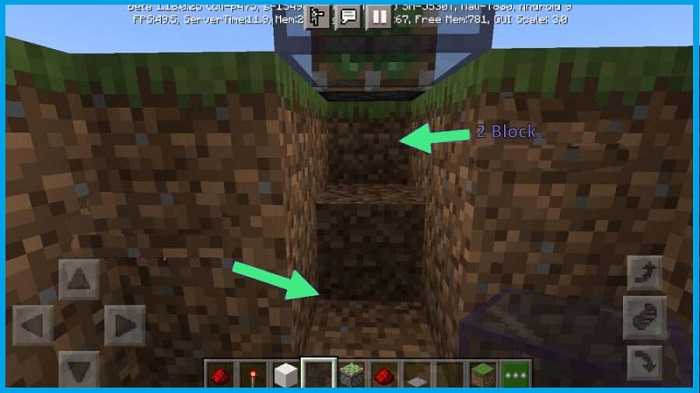
4. Also make holes on the other side as shown above.
4. Add Redstone
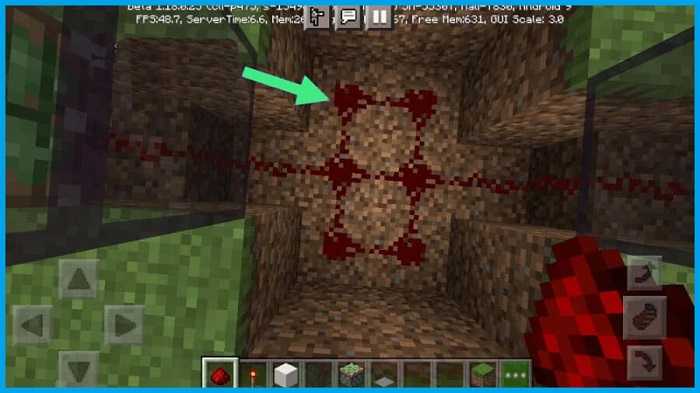
Then you just have to add Redstone to each hole you dug earlier.
Make sure all the holes are filled with Redstone, so the door can open and close automatically.
Get Also:
5. Patch Hole
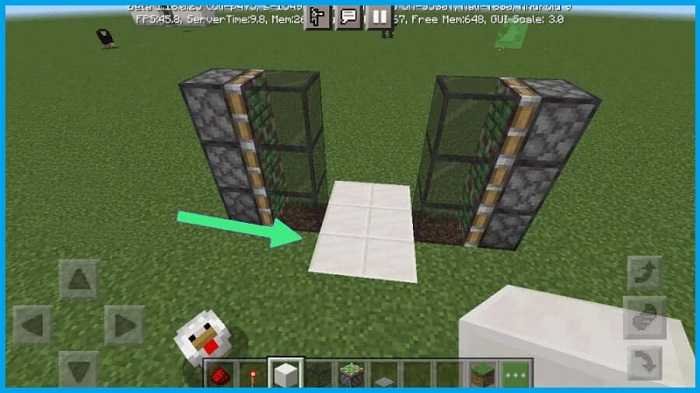
After placing Redstone in the hole, you can fill the hole you dug using a Block of Quartz.
More or less later like the picture above. In addition to Block of Quartz, you can replace it with Grass Block, Cobblestone, and so on.
6. Start Making Sensors
Here you can start making sensors using Redstone, Redstone Torch, and Block of Quartz materials. Here are the steps:
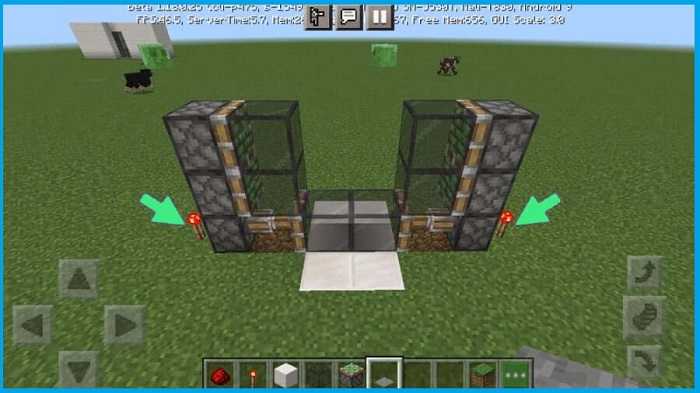
1. Install the Redstone Torch behind the first-order Sticky Piston on both sides.
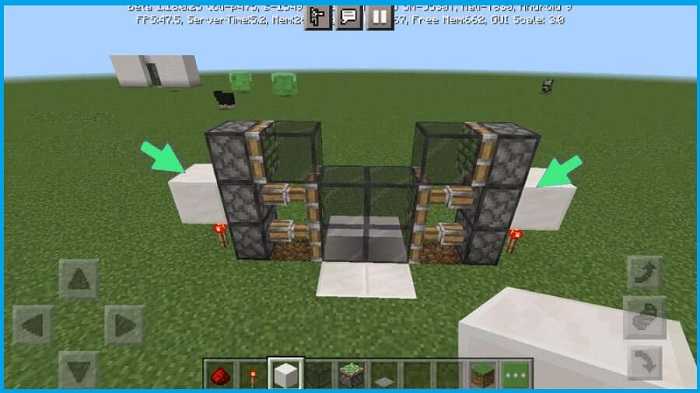
2. Then add a Block of Quartz on top of the Redstone Torch.
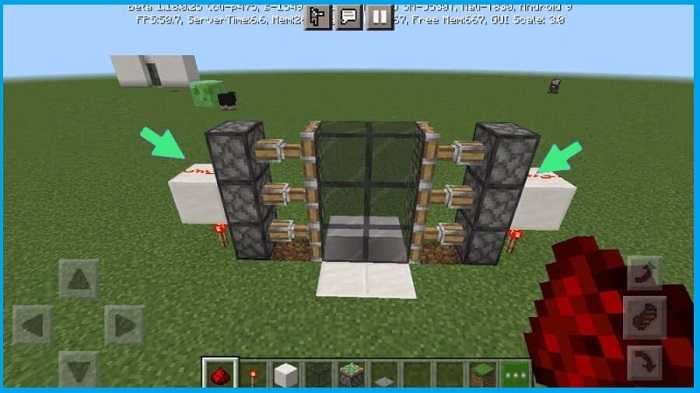
3. Above the Block of Quartz, please add Redstone.
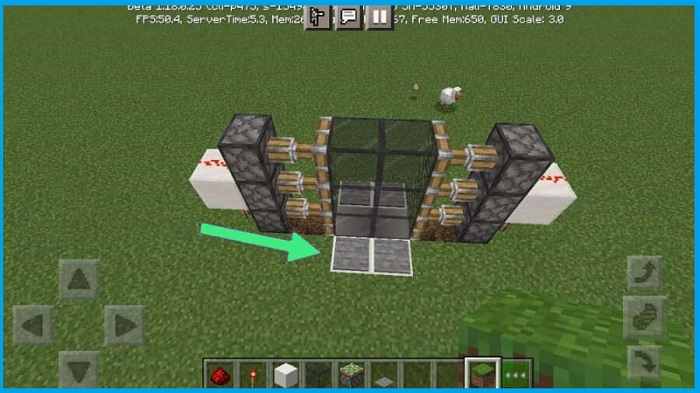
4. Finally, activate the Stone Pressure Plate and place it in front of the automatic door on both sides.
7. Automatic Door Made Successfully
All steps have been done, lastly, you just need to check it. The steps to check it are as follows:
1. Please advance to the front of the door until the Stone Pressure Plate material is compressed.
2. Then the door will automatically open by itself.
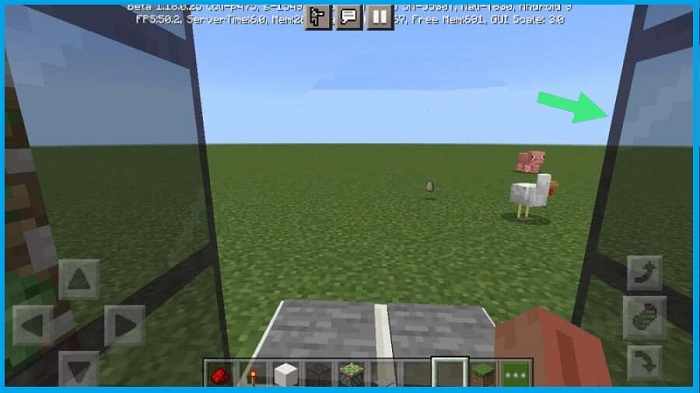
3. Then please stay away from the automatic door.
4. Then the door will automatically close.
5. Done.
The Final Word
That’s how to make automatic doors in Minecraft. Again, as I said before, this door is perfect for use in all types of buildings in Minecraft.
Starting from the house to the bull. The important thing is that the design he made must be appropriate.
Hope it is useful.


![How To Fix: Avast VPN Not Working Error On Windows [2025] Best Methods To Fix Avast VPN Not Working On Windows](https://techmaina.com/wp-content/uploads/2021/04/Best-Methods-To-Fix-Avast-VPN-Not-Working-On-Windows-218x150.png)


![How To Fix: Avast VPN Not Working Error On Windows [2025] Best Methods To Fix Avast VPN Not Working On Windows](https://techmaina.com/wp-content/uploads/2021/04/Best-Methods-To-Fix-Avast-VPN-Not-Working-On-Windows-100x70.png)

![Latest Free IPVanish Premium Accounts List [2025] Latest Free IPVanish Premium Accounts List](https://techmaina.com/wp-content/uploads/2021/09/Latest-Free-IPVanish-Premium-Accounts-List-100x70.png)