Recently, someone asked a forum that his laptop which is based on the Windows 10 operating system is having 100% disk usage problems.
According to him, this happens continuously, even when the laptop is just turned on.
After I checked again, it turned out that there were not a few people who also experienced this problem. Even not only on laptops because PC users can experience the same thing.

Then what is the cause of this 100% disk usage? And what is the effect?
Table of Contents
Causes of 100% Disk Usage in Windows
The causes of disk usage at 100% are various. Starting from viruses, and hardware damage, several sources say that this problem can also be caused by a bug in the system.
Well, for those who don’t know, disk usage itself is a tool for monitoring storage performance (SSD or hard drive). So if it reaches 100%, that means the storage is working fully.
Because it is working fully, the effect is clear. Computer performance will slow down, and can even hang.
How to Fix Disk Usage 100% in Windows [2025]
So, on this occasion, I would like to briefly discuss how to deal with 100% disk usage, for those of you who are probably experiencing it. Hopefully effective, yes.
1. Scan Using Antivirus
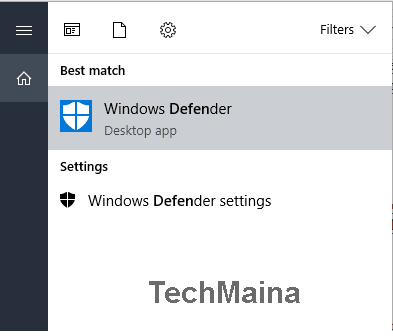
The virus is one of the common causes of disk usage which is always 100%. This virus usually works silently in the background, so it forces the computer to work harder, even if we don’t have anything to open.
For the fix, please use Windows Defender, then do the scanning if necessary.
Read Also:
2. Startup Optimization
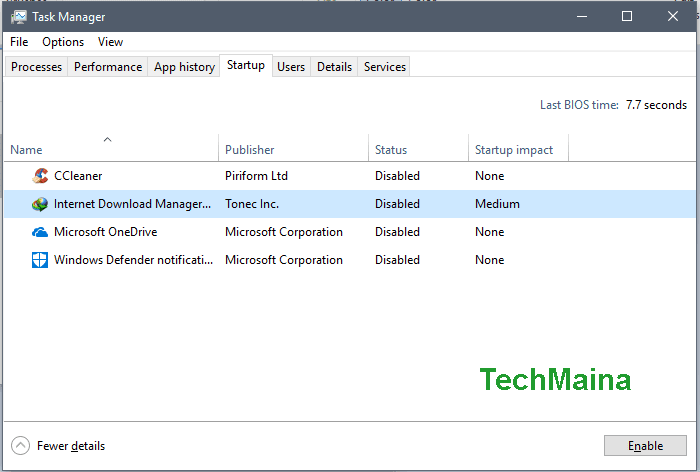
When Windows starts up, the system will first read the applications that run at startup.
Disk usage problems can arise when your hard disk is slow, but there are too many applications running at startup. So how to fix it:
- Open Task Manager first ( Ctrl + ALT + Del ).
- Go to the Startup tab.
- Then disable unnecessary applications.
3. Turn off the Windows Update Function

By default, Windows Update will always run on Windows 10.
Well, some sources say that Windows Update in some situations can make storage work harder.
But keep in mind too, if the source of the problem isn’t Windows Update, it’s better if this feature is still turned on.
The goal for Windows 10 is you can always be maintained performance, with updates – updates the latest from Microsoft.
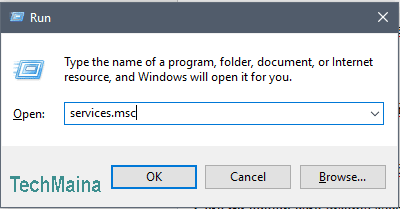
4. Turn off the Windows Search Function
Windows Search function to search for a file – a file on the computer more quickly. But if you never use it, then you can try to disable this function.
Don’t worry, disabling it doesn’t mean removing the Windows search function completely.
You can still search for the files you want through Windows Search, although the required search process will take longer.
How to disable Windows Search:
- Open Run (by clicking Windows key + R ), then type ” services.msc ” in the column provided.
- Find Windows Search, then right-click it, then click Properties.
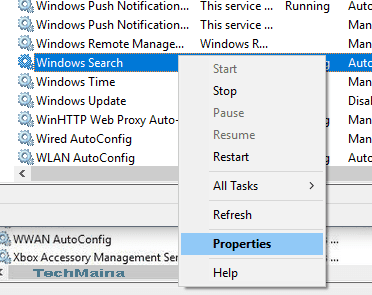
- Change the Startup Type option to Disabled. Click Apply, then click OK.
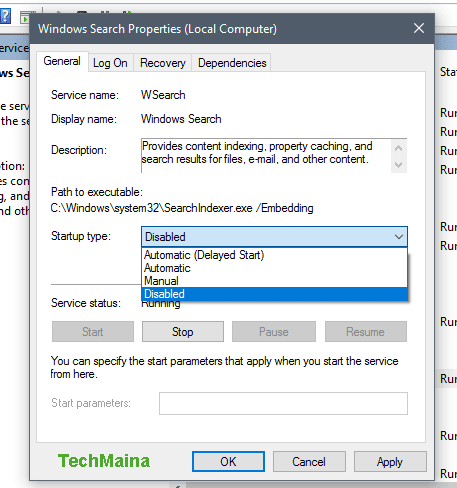
After these steps are done, restart your computer.
This method is a way of permanently deactivating. But if you want to restore it, just repeat the same steps, but only change the Startup Type to Automatic.
Read Also:
5. Turn off the SuperFetch Service
SuperFecth is a useful feature for reducing boot times in Windows and is useful for making programs run efficiently.
However, the SuperFetch service also turns out that sometimes it can cause disk usage to be 100%, you know. If that happens, then we need to turn it off.
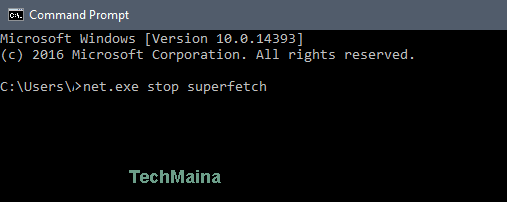
How:
- Click the Windows + X.
- Then select Command Prompt (Admin).
- Type ” net.exe stop superfetch “, then wait a few moments until the process is successfully shut down.
After that, try restarting your computer.
6. Change Explorer.exe Settings
By default, Windows Explorer is organized in such a way as to suit user needs.
However, you can try this option if you are experiencing 100% disk usage.
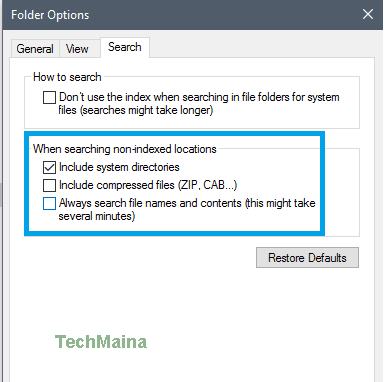
- First, open This PC in Windows Explorer.
- Then click the View tab.
- Then select the Options option.
- Click the Search tab.
- Then change Include Compressed Files (ZIP, CAB …) and Always Search File Names and Contents (This Might Take Several Minutes to Off mode.
If so, restart your computer.
7. Reduce Running Applications

When an application is run, the source of the application will be taken from storage before being accessed by other components.
Well, the problem is when there are a lot of running applications, but the device specifications are not qualified. This can result in storage overloading, which ultimately leads to high disk usage.
So how to fix it:
- Open the Task Manager.
- Go to the Users tab.
- Then End Task unneeded applications.
Use this method if the startup optimization method number 2 doesn’t work.
8. Reinstall Your Windows 10

The reinstall option is done when you have done the methods above, but it’s still not effective.
You can also consider an OS downgrade option if your laptop or PC doesn’t meet its specifications to run Windows 10.
Because from my experience, PCs or laptops whose specifications are not compatible with Windows 10, will experience a decrease in performance and result in higher disk usage.
9. Check Your Hard Drive
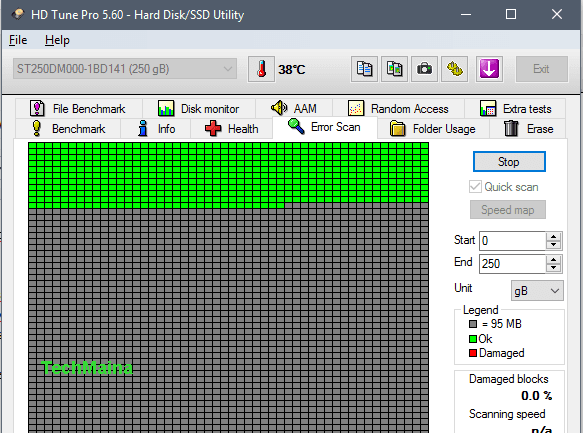
Apart from Windows, the cause of disk usage which is often 100% can also be caused by hard disk problems, you know. The condition that most often occurs is bad sectors.
When the hard disk has bad sectors, the hard drive will experience a significant decrease in performance, even up to 80%.
This of course will cause Windows performance to slow down even more, and the applications that will be loaded also pile up.
Therefore, please check your hard drive using the HDTune application or Harddisk Sentinel. If there are bad sectors, you inevitably have to replace the hard drive.
10. Consider Replacing an SSD

If it still doesn’t work, try changing your laptop or PC system storage to an SSD. This applies if you are still using the previous hard drive.
The reason is, that the application processing is smooth depending on the speed of the storage used.
Now, because SSDs have a much better speed than hard drives, this can help in eliminating 100% disk usage problems.
How many users have tried these tips and succeeded?
The Final Word
It’s not easy to Fix disk usage 100%. This problem can be difficult, or it can be easy to fix, depending on which cause we are experiencing.
But basically, if your Windows 10 is clean, with adequate specifications, and components are also in good health, this 100% disk usage problem should never appear.
If it does appear, that too rarely happens.
So, if you are still having this problem, even though you have tried the 10 tips above, try asking again via the comment box below. Maybe I can help.
May be useful.


