Howdy friends, today we are going to sharing with you how to turn off the secure boot or disable secure boot and how to enable secure boot in windows.
So, without wasting time let’s get started to point…
There are a variety of boot settings in Windows, each of which has its own function. Well, one thing you have to know is secure boot.
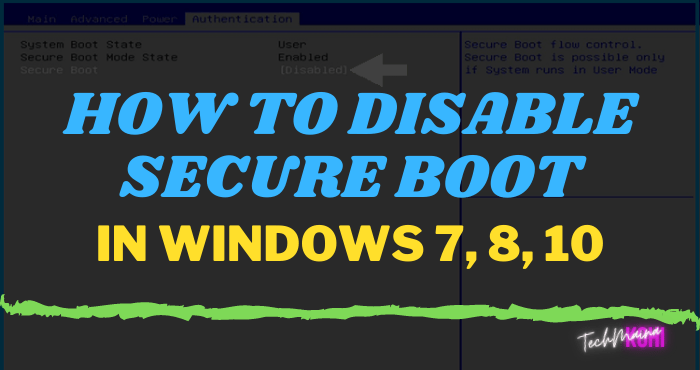
What is a secure boot? In short, this feature serves to maintain OS security.
Namely by making the computer or laptop boot by loading the system’s built-in programs or the laptop.
Then block other programs that can run. For example, from USB, DVD, and others the like.
Table of Contents
How to Disable UEFI Secure Boot
Secure boot is usually used to minimize errors during the boot process. But there are times when you have to disable this feature for some needs.
For example when you use dual-boot, to load more than one OS (Windows + Linux generally).
To disable it, you have to enter BIOS mode. Because this setting is only found in the BIOS.
# 1. Turn off Secure Boot Directly
Here’s how to disable secure boot :
- Turn off the computer or laptop
- Turn it back on
- Press the BIOS key (between F1 to F12, ESC, or Del)
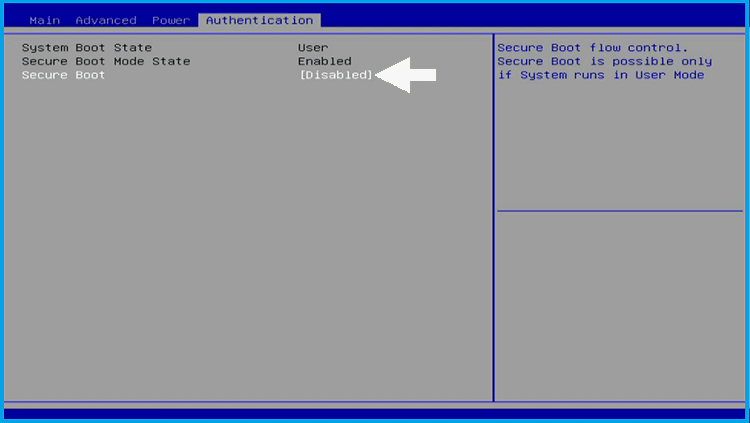
- Enter Boot or Authentification settings
- Please disable secure boot
Please follow this method if you know the BIOS key, and the fast boot position is disabled.
# 2. Through Windows
If you turn on your computer or laptop and then the BIOS screen doesn’t appear, you can follow these steps.
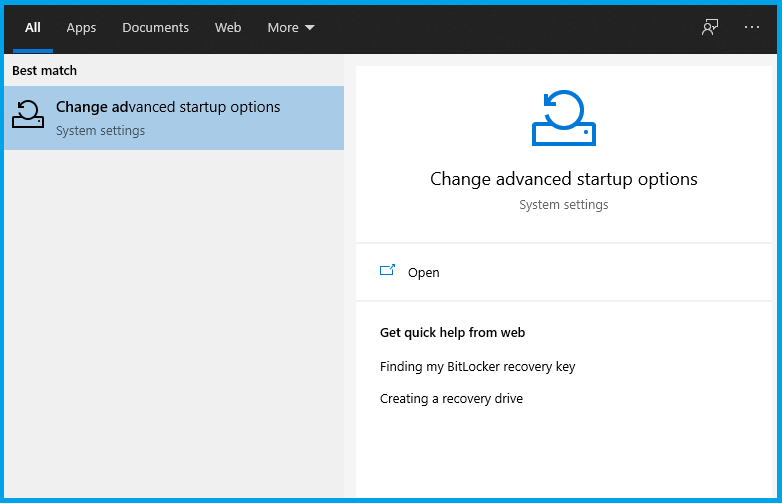
- First, you can open the start menu by pressing the Windows key.
- Then find and select the change advanced startup options menu.
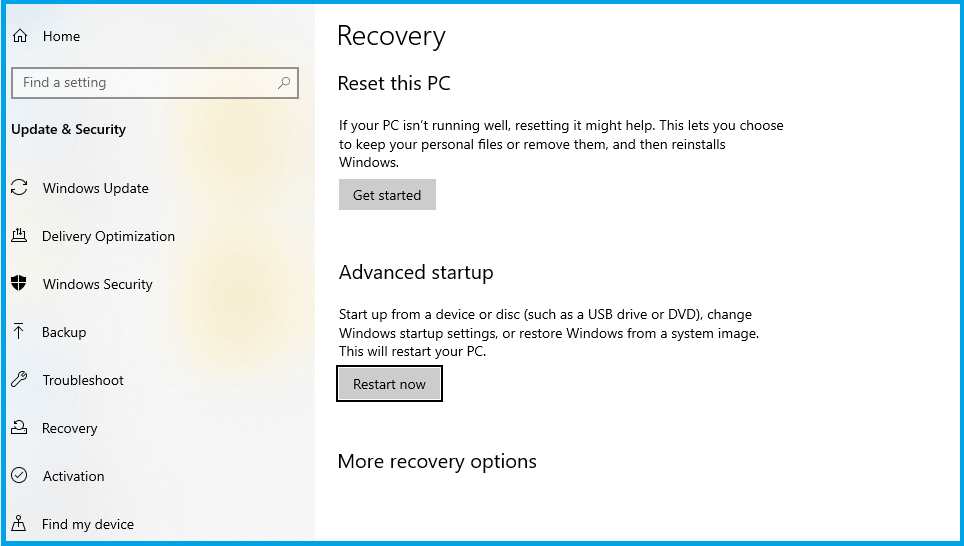
- Please check the Advanced startup column.
- Click raffle Restart Now.
- Later you will be directed to the Choose an option page.
- On this page, please click the Troubleshoot menu.
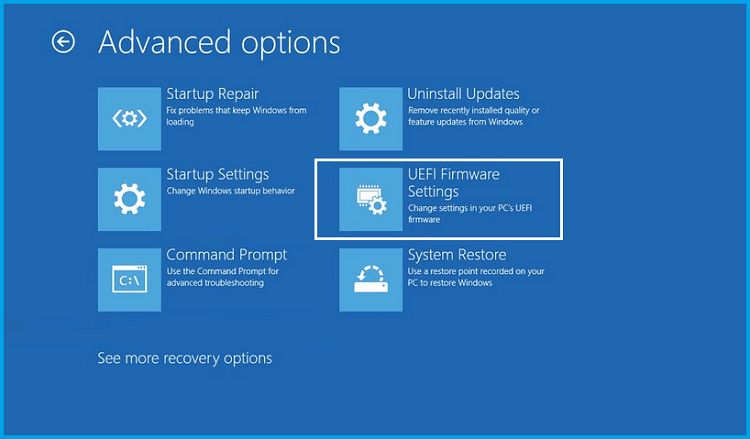
- Continue to click the Advanced Options option.
- Since the secure boot is in UEFI settings, please click on UEFI Firmware Settings.
- Here you can just press the Restart button.
- Wait a few moments until you enter BIOS mode.
- After that, you can click the Authentication tab.
- Insecure boot, please change it to Disable.
- Done.
If you don’t find the settings, please deactivate the fast boot feature first and then test again.
Don’t forget to save the BIOS by pressing Save Changes and Exit.
When is Secure Boot Disabled?
If asked like this, then I just answer as necessary. The reason was, that the secure boot feature is specially programmed for Windows security systems.
If from this security there is an active blocking of the program you want to run, then the secure boot feature can be disabled.
For example dual – boot as I mentioned, or when you want to boot via USB or DVD in which there is a special application.
Additional:
- Disabling secure boot will not erase all data on your PC.
- The BIOS settings on a PC or laptop are basically different. You can adjust it yourself if you don’t find the menu
How to Re-Enable Secure Boot
To turn it back on, do the same steps as before. Changing the disabled option to be enabled.
But if there is an error, you can open the Exit menu then there are an option Load Defaults, please select.
This option will return the secure boot setting to active again.
Or finally, you can also reset the CMOS on the motherboard.
Conclusion
That is the discussion on how to disable secure boot. If there is nothing in particular that you want to do, my advice is to just enable secure boot.
The reason is that with secure boot, a computer or laptop system can run more stable. And also to avoid errors that might arise.
If you have any questions, please send them via the comments column.
Hope it is useful.




![How to Tell If Your Processor Is Going Bad [2025] How to Tell If Your Processor Is Going Bad](https://techmaina.com/wp-content/uploads/2022/03/How-to-Tell-If-Your-Processor-Is-Going-Bad-218x150.png)
![How To Solve: Laptop Speakers Not Working Issue [2025] How To Solve Laptop Speakers Not Working Issue](https://techmaina.com/wp-content/uploads/2021/02/How-To-Solve-Laptop-Speakers-Not-Working-Issue-218x150.jpg)
![Fixed: SIM Card Not Detected Error on Any Phone [2025] Fixed SIM Card Not Detected Error on Any Phone](https://techmaina.com/wp-content/uploads/2021/07/Fixed-SIM-Card-Not-Detected-Error-on-Any-Phone-100x70.png)


![How to Fix Unfortunately Contacts Has Stopped Error [2025] How to Fix Unfortunately Contacts Has Stopped Error](https://techmaina.com/wp-content/uploads/2021/07/How-to-Fix-Unfortunately-Contacts-Has-Stopped-Error-100x70.png)