Howdy friends, Your laptop brightness not working, am I right? if yes, then you are in the right place.
Because in this post we will share the best working method to fix the problem of “Brightness Not Working in Windows 10”.
Let’s get started…

Brightness is an important part that sometimes we have to adjust. The goal, so that the eyes are comfortable and do not get tired quickly when looking at the screen for a long time.
Both on the computer and on the laptop, the brightness settings are provided by Windows as a basic feature, which can be adjusted on certain pages.
Unfortunately, sometimes there are issues with this feature too. For example, such as screen brightness cannot be adjusted.
I have experienced this condition several times. On laptops with Windows 7 OS, Windows 8.1 laptops, and Windows 10 laptops.
Come on, we discuss this problem further.
Table of Contents
Causes of Unset Brightness On Windows
Of course, this unregulated brightness problem is quite a bother. Especially for people whose jobs need to look at the monitor screen for a long time.
The causes themselves vary, including:
VGA driver not installed: VGA driver functions to process images, including the screen. Therefore, don’t be surprised if the brightness function doesn’t work if the driver isn’t installed. It is mostly found after the install again.
Bug on a driver: Driver VGA is already installed, but run into a bug ( error ). As a result, it is unable to function properly. This can also affect other features, such as the brightness of this screen.
Bug in the system: Bug this system could be due to many things. But usually, it is caused by corrupt data. This can also affect the brightness settings.
Virus problem: When a computer gets infected with a virus, usually the system will become unstable, and will cause some data corruption.
And others.
How to Fix Brightness Not Working in Windows 7, 8, 10
Here, I want to try to explain, related to several solutions that can be used to fix Brightness Not Working in Windows 10, 8.1, 8, 7.
The following is the discussion:
1. Install VGA Driver First
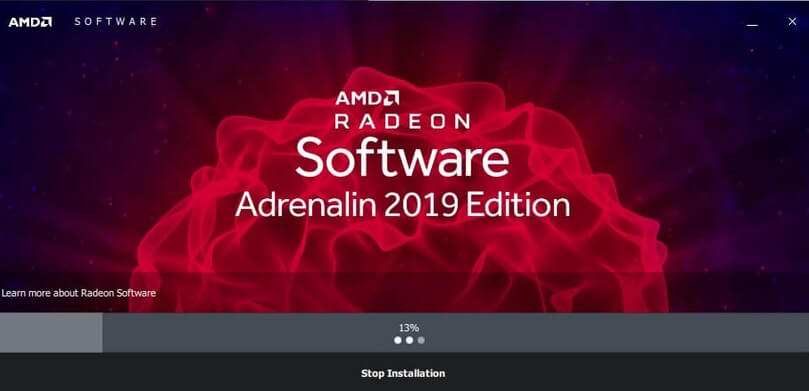
There are generally 3 types of VGA drivers, namely AMD, Intel, and NVIDIA. But basically, the steps that must be taken in the installation process are not much different.
The picture is like this:
- Please look for the DVD driver that came with your laptop or computer.
- Then insert it into the DVD drive.
- Next look for a folder called Graphics, VGA, Intel, AMD, or NVIDIA.
- Find and open the installer application.
- After that, just click Next and continue following the instructions given.
For example, in the past, I shared a tutorial for installing VGA drivers (for AMD only).
2. Re-Install Driver
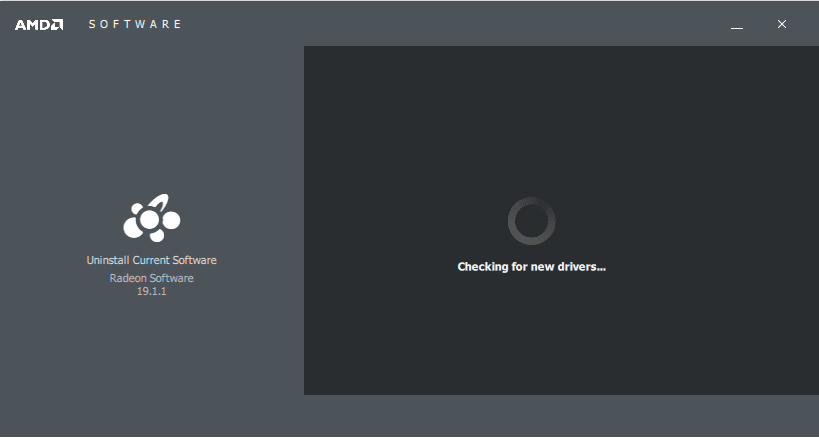
Reinstall ( install again) here, is intended to replace the driver that an error or have a bug.
For now, more or less the same as before. Can use the built-in DVD. But if after installing the driver, the brightness still doesn’t work, you can try downloading a new driver from the official VGA website.
Don’t forget to remove old drivers. Use driver removal software such as DDU, before installing any new drivers again.
In addition, make sure that the drivers installed to match the version of Windows on your computer or laptop.
Read Also:
3. Adjust Brightness Via Driver
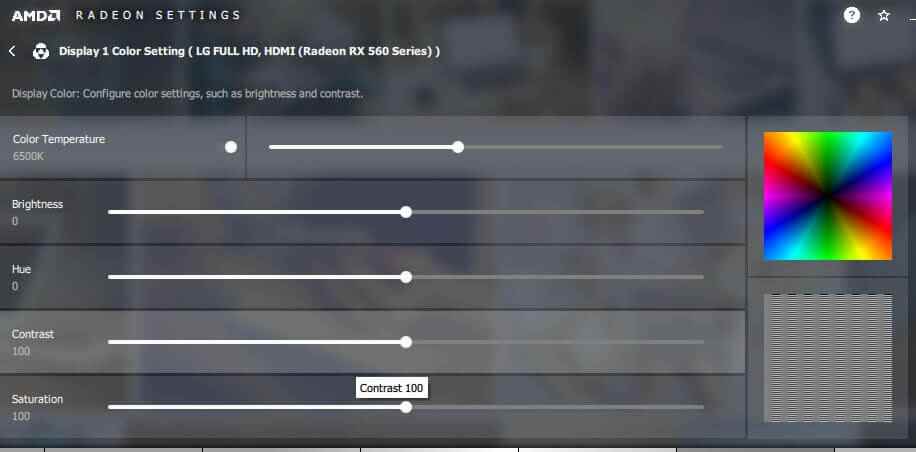
Most people adjust the brightness via the keyboard keys ( FN + anyone from F1 to F12 ) or through the brightness settings in Windows.
It’s not wrong, though. But actually, the driver also has a VGA brightness setting. This could be an alternative that you might try. Who knows it works.
How:
- Right-click on the desktop.
- Click Graphics Options.
- Look for the Brightness setting.
- Then set it there.
For Graphics Options, it can vary depending on the VGA used. It can be the NVIDIA Graphics Control Panel or AMD Radeon Settings.
4. Using the Basic Display Driver from Microsoft
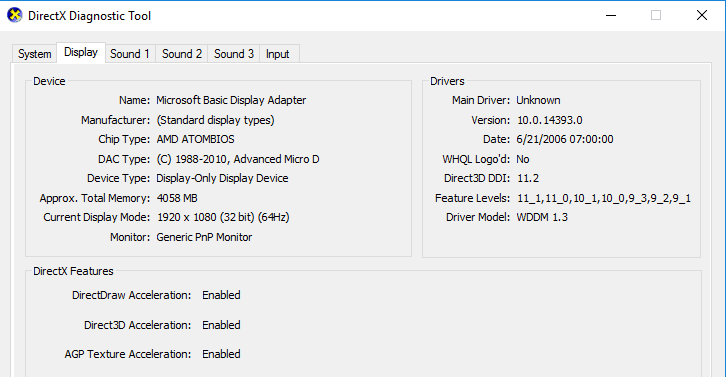
In Device Manager, there is one driver called Basic Display Driver. The function itself is to display the screen, but in a basic function (just so much).
Here we will try to refresh the VGA driver using the Basic Display Driver. The goal is to eliminate errors that may exist.
This method I got from overseas sites, and many have successfully implemented it.
Here’s how:
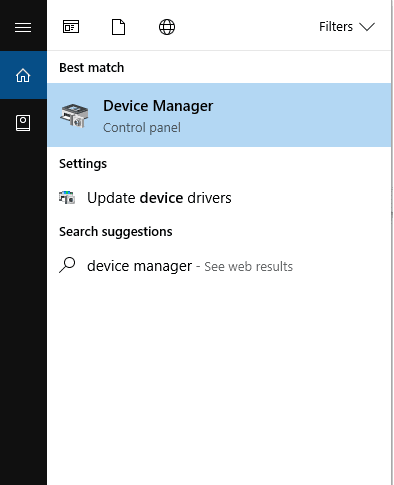
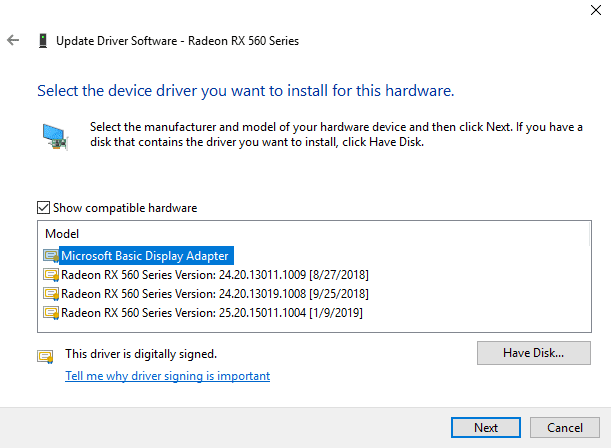
- In the Windows search field> Type ” Device Manager “> Then open it.
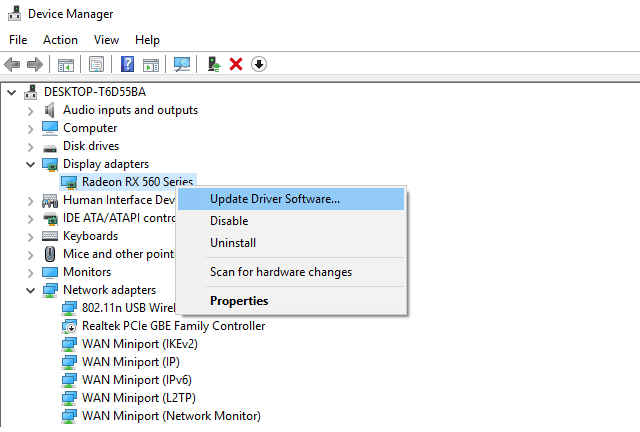
- Next, select the Display Adapter option > Right-click on the detected VGA (can be Intel, NVIDIA, AMD)> Then click Update Driver Software.
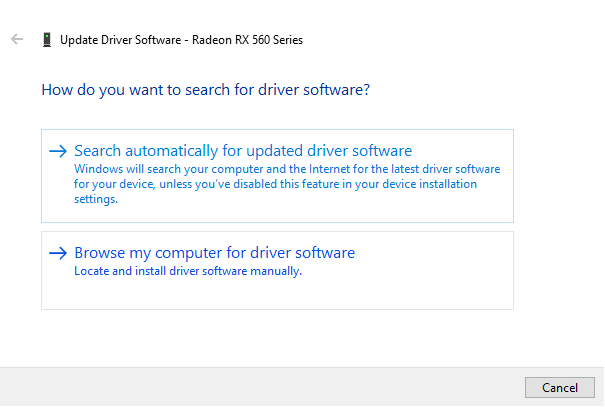
- After that, click the Browse My Computer for Driver Software option.
- Then select the option Let Me Pick from a List of Device Drivers on My Computer.
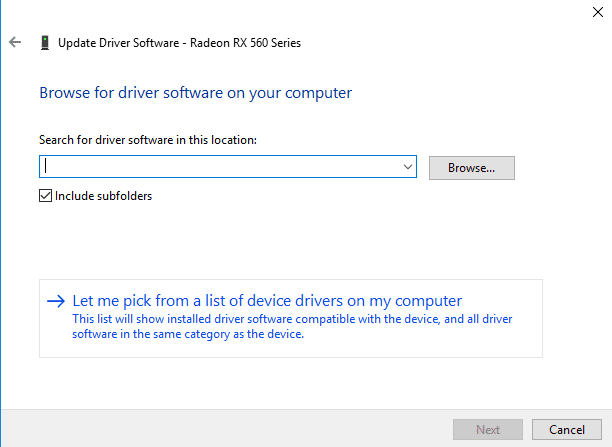
- That way, you will see two or more drivers read. Select Microsoft Basic Display Adapter, and click Next when done.
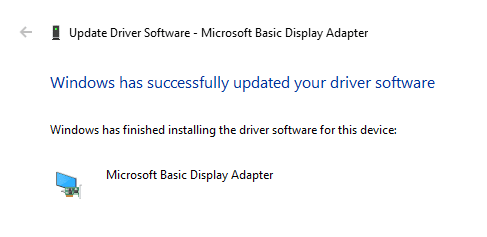
- Wait for a moment. Usually, the screen will flash black for a few seconds (this is normal, no need to panic). After that the following notification will appear:
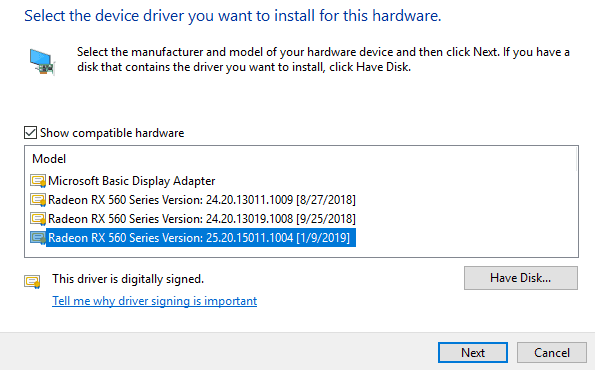
- Next, please repeat the steps above, from numbers 1 to 5. But in step 5, select a driver that is not the Basic Display, but the main driver.
- Wait a few more moments, until the screen is finished flashing black again.
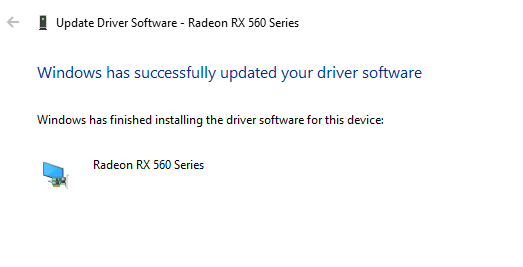
- If so, please restart your computer or laptop.
To perform the steps above, make sure the VGA driver is installed correctly so that it can be detected.
5. Roll Back VGA Driver in Device Manager
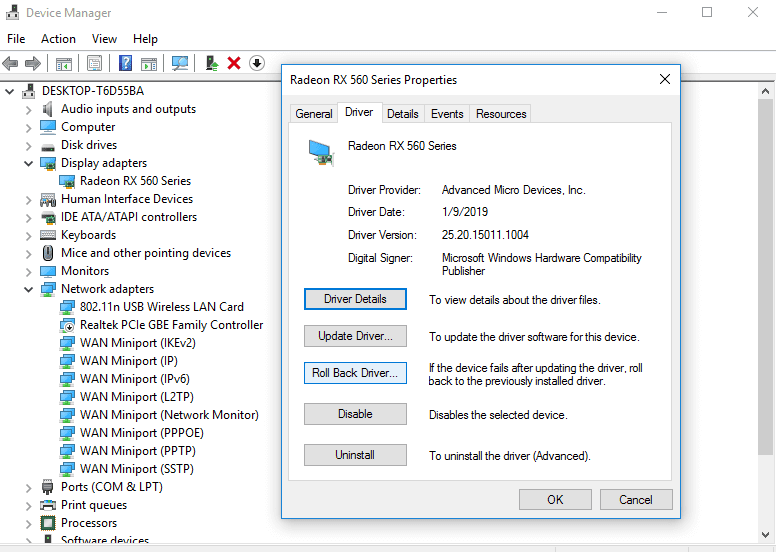
Not only updates but the VGA driver installed on the system can also be rolled back, you know. That is, to return the new version of the driver to an older version.
What’s the goal? So, not all new drivers run normally. Sometimes the updates are still not perfect, so they actually cause certain bugs or errors. One of them, as in this brightness.
Now, by returning it to an older version, it is hoped that the existing bugs can be removed, so that the driver can run normally again.
The method itself is not difficult, really.
- Open Device Manager.
- Click Display Adapter.
- Right-click on the VGA driver available there.
- Then click Properties.
- Click the Driver tab.
- Then click Roll Back Driver.
Wait for the process for a few moments. If so, restart as usual.
6. Reboot the VGA Driver in Device Manager
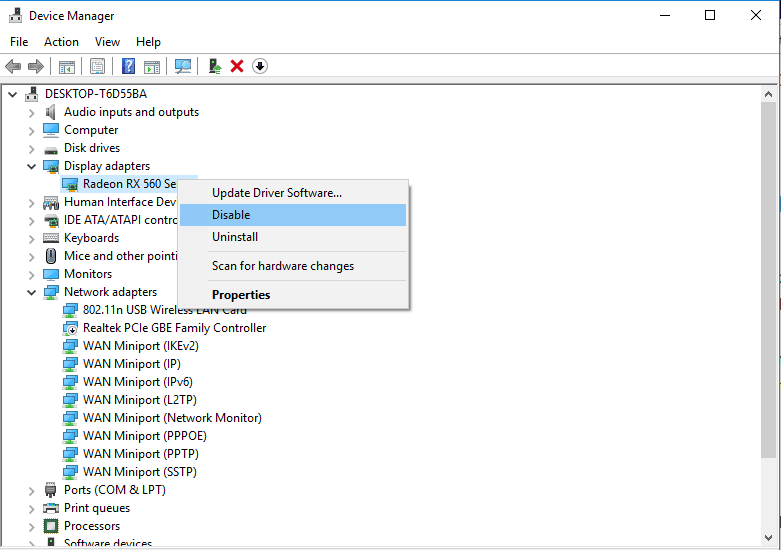
Reboot the VGA Driver in Device Manager it is also the best method to fix Windows 10 Brightness Not Working in your laptop.
Still about the driver problem in Device Manager, which I also learned from overseas technology sites.
The steps that must be done are like this:
- First, open the Device Manager as usual.
- Click Display Adapter > Right-click on VGA driver (Intel, NVIDIA, AMD)> Click Disable.
- Wait a few moments, until the monitor is finished flashing black.
- If so> Right-click again on the VGA driver > Then click Enable.
So, if please try adjusting the brightness again. If you can’t, try restarting first.
7. Update Your Windows Version
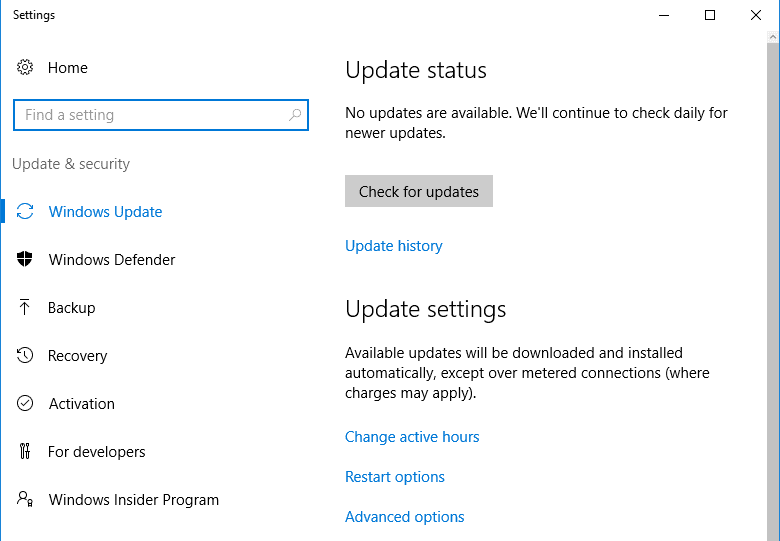
If you are using Windows, then the update position is off, indirectly making the updated windows version available to pile up.
Well, here many don’t know, that some versions of Windows may contain bugs in them.
What kind of bugs do they mean? Miscellaneous.
For example, making WiFi malfunctioning, printer drivers not working, games being broken, to unmanageable brightness issues as we are discussing here.
To overcome this, the update option is the most effective way. The reason is, that often the bugs that were there before will disappear.
Besides updating, the rollback option can also be an option, especially if you get this error after updating the version.
To do this, you can check the Control Panel > Uninstall Program > Then delete the updates that are there.
8. Enable Generic PnP Monitor
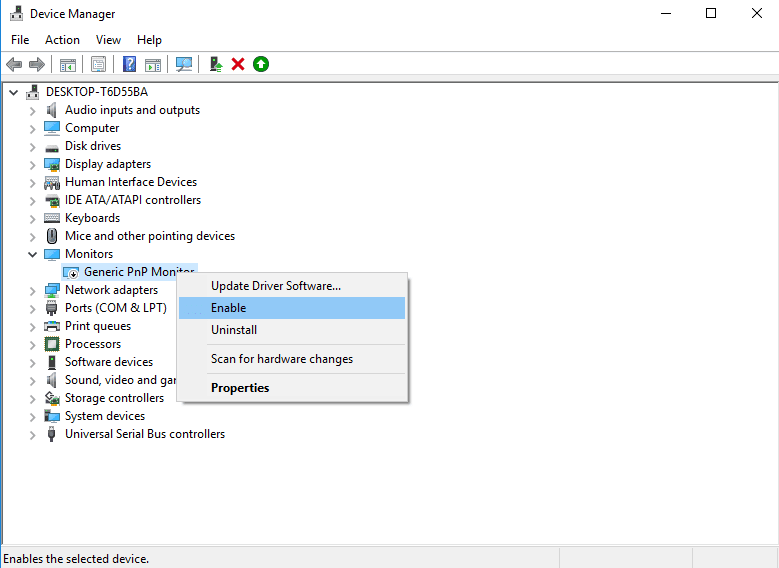
This problem does not always come from the VGA driver, because the monitor can also affect the brightness settings.
More precisely, the monitor I mean here is the Generic PnP Monitor. This is an automatic driver that is installed so that Windows can recognize the monitor.
The problem is, sometimes this driver likes to change the setting to disabled. Usually due to a bug in the VGA driver or the like.
For how to fix it:
- Please open the Device Manager.
- Open the Monitor menu.
- Right-click on Generic PnP Monitor.
- Then click Enable.
9. Set the Registry in Windows Systems
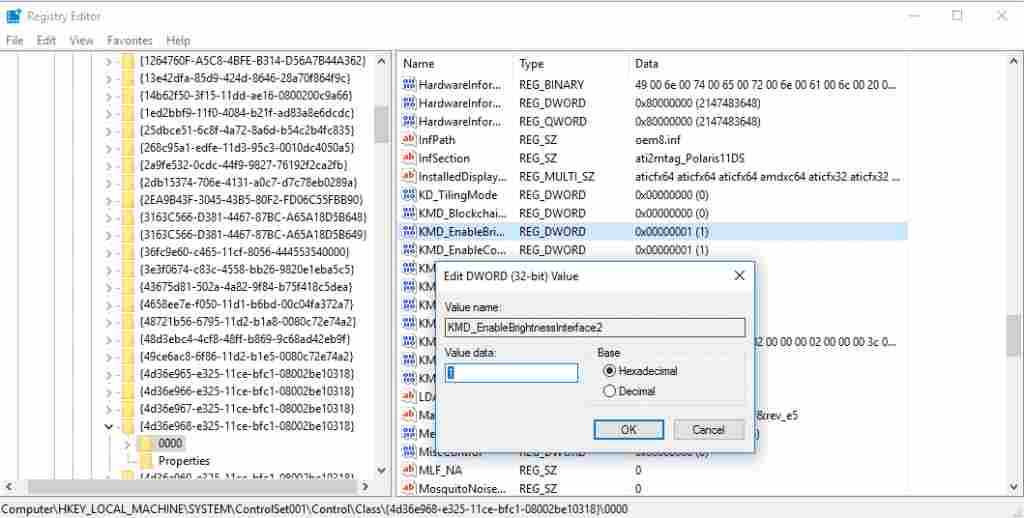
The registry is a collection of “records” stored on Windows. Its function is to store certain configurations, both from applications and systems.
Here, there is a registry that functions to adjust the brightness configuration, and we can adjust it if the screen brightness is experiencing errors.
Like this how:
- Press Windows key + R > Type ” Regedit “> Then click OK .
- Next, go to HKEY_LOCAL_MACHINE > SYSTEM > ControlSet001 > Control > Class > {4d36e968-e325-11ce-bfc1-08002be10318} > 0000 .
- On the right side menu, please look for the registry with the name KMD_EnableBrightnessInterface2, then click twice.
- Change the value to 0.
- For the Base setting, set it to Hexadecimal.
Oh yes, try checking too, maybe in the Regedit menu, there will be more than 1 KMD_EnableBrightnessInterface. If so, set all values to 0.
For Intel HD users, you can try the following settings:
- Open Regedit.
- HKEY_LOCAL_MACHINE> SYSTEM > ControlSet001 > Control > Class > {4d36e968-e325-11ce-bfc1-08002be10318} > 0000 .
- In the menu on the right, look for the FeatureTestControl registry. Double click the registry.
- Then change the value, from f000 to f008.
After that, try restarting first, then adjusting the brightness again.
10. Set Battery Settings to Balanced or High Performance
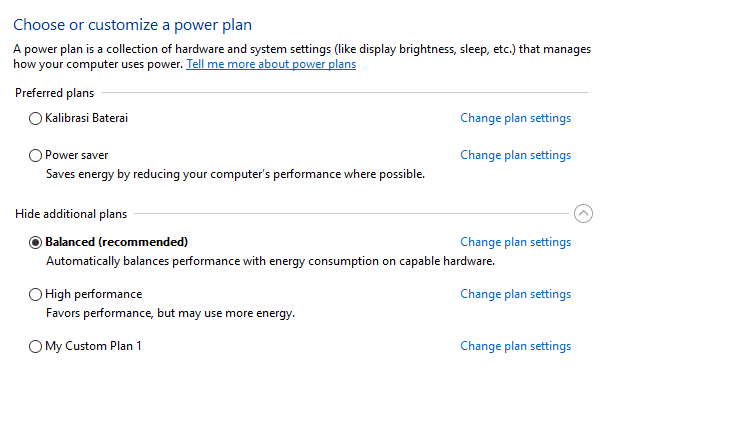
Especially for laptops, the battery setting that is set to Power Saver sometimes can make the brightness change to adaptive, where it will adjust automatically, so we can’t adjust it manually.
Therefore, it is recommended to change the setting to Balanced or High Performance first.
The method is something like this:
- Enter Control Panel.
- Hardware And Sounds.
- Power Options.
- Click Show Additional Plans.
- And change to Balanced.
If you want, you can also set it manually by pressing Change Plan Settings. Maybe want to save more battery.
Conclusion
If we check again, it turns out that there are a lot of solutions. Not just 1 or 2 solutions, but 10.
In order to make it easier to understand, let’s make a conclusion here.
- Install VGA Driver: Its function is to activate the VGA driver.
- Reinstall VGA Driver: Its function is to replace the old VGA driver which has an error.
- Adjust Brightness Via Driver: As an alternative, if the brightness settings via the keyboard and Windows default controls don’t work.
- Using Basic Display Driver: To Me- refresh driver VGA using driver Basic from Microsoft.
- Rollback Driver VGA (Device Manager): Serves to return the VGA driver to an old version.
- Re-Enable VGA (Device Manager): Serves to refresh the currently running VGA.
- Update Windows Version: Aims to fix bugs in the system.
- Enable Generic PnP Monitor: To turn on the monitor driver that was accidentally disabled.
- Set Registry Via Regedit: To reset the configuration on brightness.
- Adjust Battery Settings: Serves to remove the adaptive brightness feature, so that it can be adjusted manually again.
All these methods (1 to 10), I write the order based on personal recommendations to fix Brightness Not Working in Windows 10.
However, this is non-binding. So, you can still choose whichever method you need.
Closing
Unlike similar errors, overcoming brightness that does not work in Windows 7, Windows 8, or Windows 10 has a lot of options.
This is normal, considering the errors that occur on each computer can take different forms.
Even though I have written here as completely as I can, there may be other errors that haven’t been addressed.
So, if you experience this, please ask via the comments column below.
May be useful.


Thanks a lot!
Glad to help.