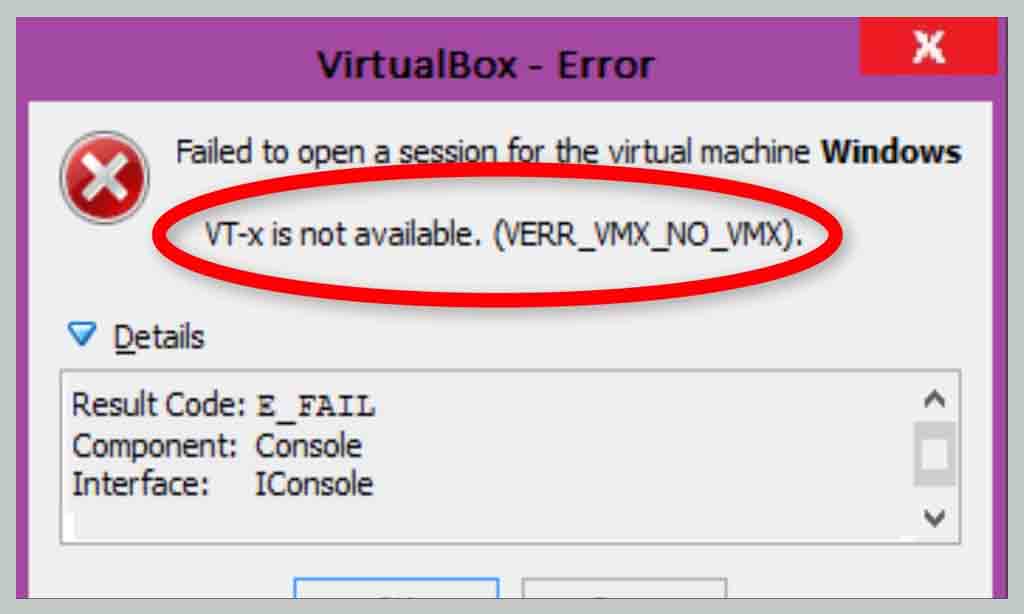
Sometimes you may get “ VT-x is not available (VERR_VMX_NO_VMX) ” if you try to start an x64 bit virtual machine in VirtualBox.
![Fix [VirtualBox] – VT-x Is Not Available Error – (VERR_VMX_NO_VMX) Fix [VirtualBox] – VT-x Is Not Available Error – (VERR_VMX_NO_VMX)](https://techmaina.com/wp-content/uploads/2021/01/Fix-VirtualBox-–-VT-x-Is-Not-Available-Error-–-VERR_VMX_NO_VMX.jpg)
Table of Contents
What Are the Causes Of This VT-X is Not Available Error?
- It disabled in the BIOS settings :
If not enabled in BIOS settings, it will cause this error on your computer when opening VirtualBox.
- Your computer’s processor does not support VT-X :
Although this happens very rarely, there are still cases where this error has occurred because the system was not equipped with the necessary processor to support this technology.
- Hyper-V virtualization technology is enabled on your computer :
This is the other most common reason that can cause this error on your computer. Microsoft’s Hyper-V technology is known to conflict with this technology.
Therefore, if Hyper-V virtualization is enabled on the system, then your operating system will disable it.
- Avast’s June 2017 update disabled it :
The update released by Avast in June 2017 was found to be the reason for the deactivation.
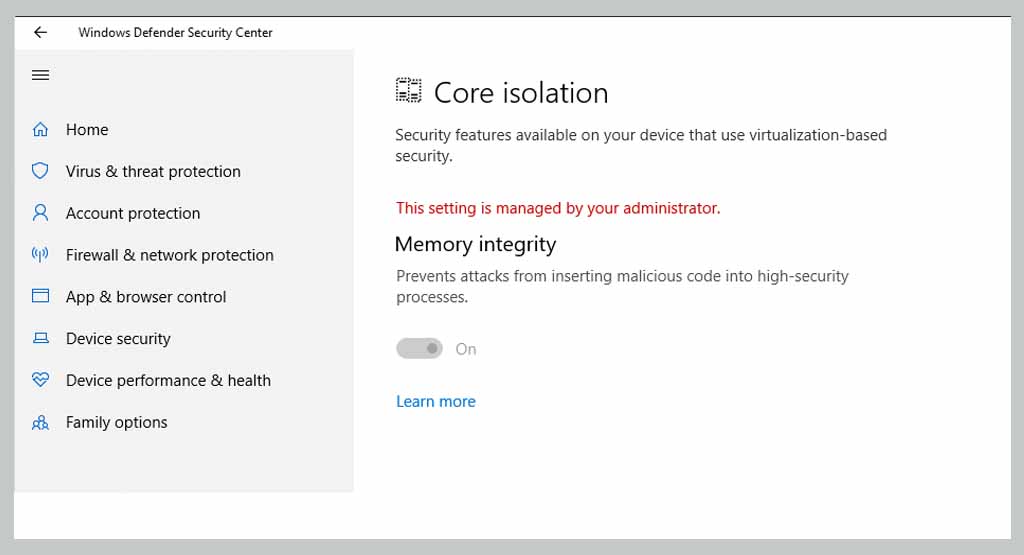
- Core isolation is enabled :
Kernel isolation is a security option in Windows Defender that conflicts with VT-X if VT-X is enabled on the PC.
How To Fix VT-X Is Not Available Error On Windows 10?

Here are 3 effective solutions to resolve this error:
Fix 1: Disable Microsoft Hyper-V
We recommend that you take care of it as it will remain enabled on the system and prevent VT-x virtualization from working.
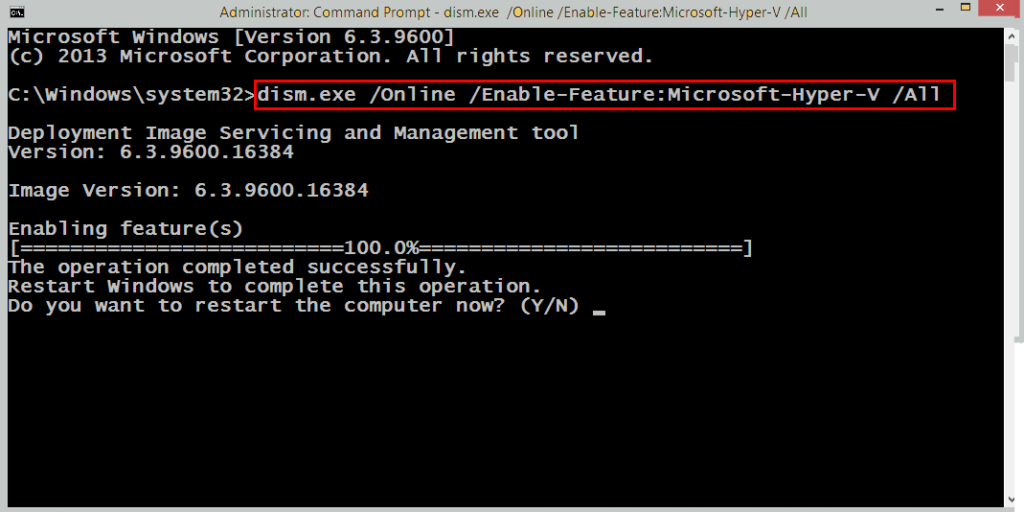
So, to repair the VirtualBox, you need to turn off Microsoft’s Hyper-V.
Follow the next steps to disable it on your computer:
- Go to the Windows search box and type cmd.
- Click with the right mouse on the command prompt and select Run as administrator.
- Type the following command in the command prompt and press Enter key after each command:
dism.exe / Online / Disable-Feature: Microsoft-Hyper-V bcdedit / set hypervisorlaunchtype off

- After running the commands, exit the command prompt and restart the computer.
Now open the VirtualBox and check if it resolves the VT-x is not available (verr_vmx_no_vmx) error.
Fix 2: Disable Kernel Isolation on Defender
Win Defender Core Isolation is a device security option, and according to some users, this option is used to conflict with the VT-x.
So, if you are using Defender as your default antivirus and you receive the error is not available (verr_vmx_no_vmx), then you need to disable the Core Isolation option.
Here are the steps you need to follow to do so:
- First, go to the search box and type in Defender.
- Select Defender Security Center from the search results.
- In the Security Center window, click the Device Security tab located in the left pane of the window.
- Next, click on the “Core Insulation Details” option under the Core Insulation section.
- Now turn off the toggle button given under Memory Integrity.
- Finally, restart your computer.

Now check if you can run the Virtualbox VM without receiving the error is not available. If not, proceed to the next solution of enabling Virtualization Technology or VTx / VTd.
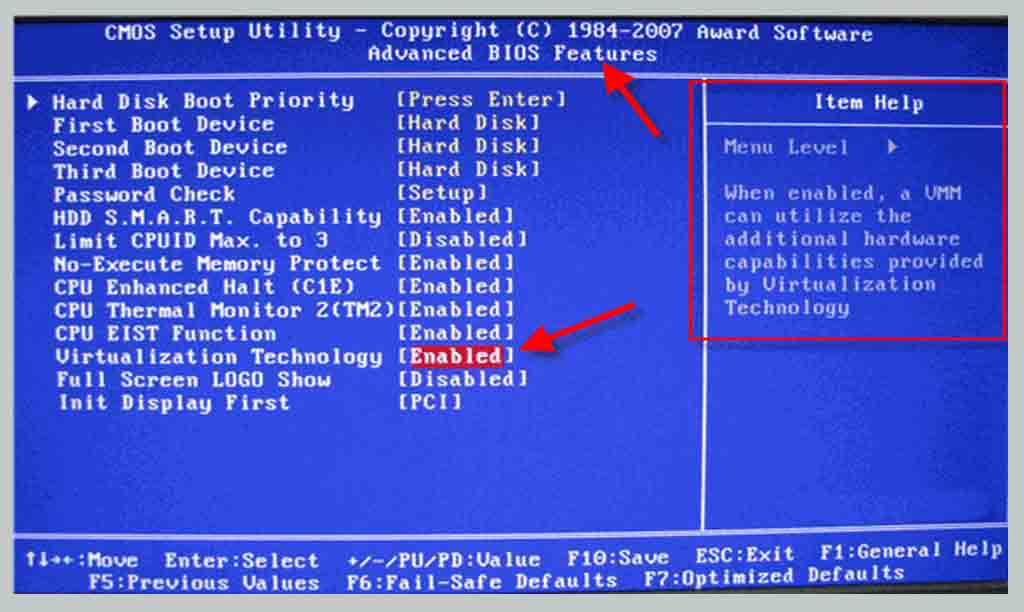
Fix 3: Enabling VT-X From BIOS Settings

If you’ve gotten this far with no results, it’s likely that the reason you’re getting the VT-x is not an available (verr_vmx_no_vmx) error is that the technology is disabled in your BIOS settings.
Keep in mind that some third-party apps may override these settings, so don’t reject this method before checking if this is true.
The steps to access BIOS settings and check if it is enabled differ depending on your motherboard manufacturer.
But in general, you can find this setting under Security (System Security) under Virtualization Technology or VTx / VTd.
Fix 4: Running commands in Command prompt
1. Open the windows 10 search box and type cmd in the search box.
2. Right-click on the command prompt and open the command prompt as an administrator.
3. Now, copy and paste the command given below and hit the enter key.
bcdedit /set hypervisorlaunchtype off


![How To Fix: Avast VPN Not Working Error On Windows [2025] Best Methods To Fix Avast VPN Not Working On Windows](https://techmaina.com/wp-content/uploads/2021/04/Best-Methods-To-Fix-Avast-VPN-Not-Working-On-Windows-218x150.png)


![How To Fix: Avast VPN Not Working Error On Windows [2025] Best Methods To Fix Avast VPN Not Working On Windows](https://techmaina.com/wp-content/uploads/2021/04/Best-Methods-To-Fix-Avast-VPN-Not-Working-On-Windows-100x70.png)

![Latest Free IPVanish Premium Accounts List [2025] Latest Free IPVanish Premium Accounts List](https://techmaina.com/wp-content/uploads/2021/09/Latest-Free-IPVanish-Premium-Accounts-List-100x70.png)